
Showing posts with label mexican. Show all posts

Friday, January 29, 2016

Thick or Thin...I'm All IN!

I know I've said it before, but it bears repeating again.  Or maybe it doesn't.  Despite this being a redundant declaration, I love soup this time of the year.  I really do.  It seems to be my "go-to" meal these days.  Most of the soup recipes in my arsenal are quick and easy and require minimal prep time or kitchen labor.  And soups can be such hearty, filling meals.  They make great leftovers, too.

All that to be said, I love finding new-to-me soup recipes.  I have quite a few Mexican flavored soups we barrel through on a monthly basis so I tend to try and steer clear of those because how different can they really be?!  But when I found this recipe and read that it included Masa and cheese, well, I was sold.  Thick and hearty and full of flavor...a different flavor than any of the other Mexican soups we keep repeating.  And it takes NO TIME to make!!  Even better!

CHEESY CHICKEN ENCHILADA SOUP

2 TBSP. Vegetable Oil
1 small white or yellow onion, diced
2 cloves of garlic, minced
1/2 C. masa harina (flour...found in the Mexican food aisle)
3 C. chicken stock
1 rotisserie chicken, shredded (or 2 cooked chicken breasts, shredded)
1 (10 oz.) can red enchilada sauce
1 (14 oz.) can black beans, rinsed and drained
1 (14 oz.) can fire roasted diced tomatoes (do not drain)
1 (4 oz.) can diced green chiles
1/2 tsp. cumin
1 tsp. salt
1 C. shredded cheddar cheese

Optional toppings:  sliced avocado, pico, sour cream, cilantro, tortilla strips, more cheese...whatever your heart desires :)
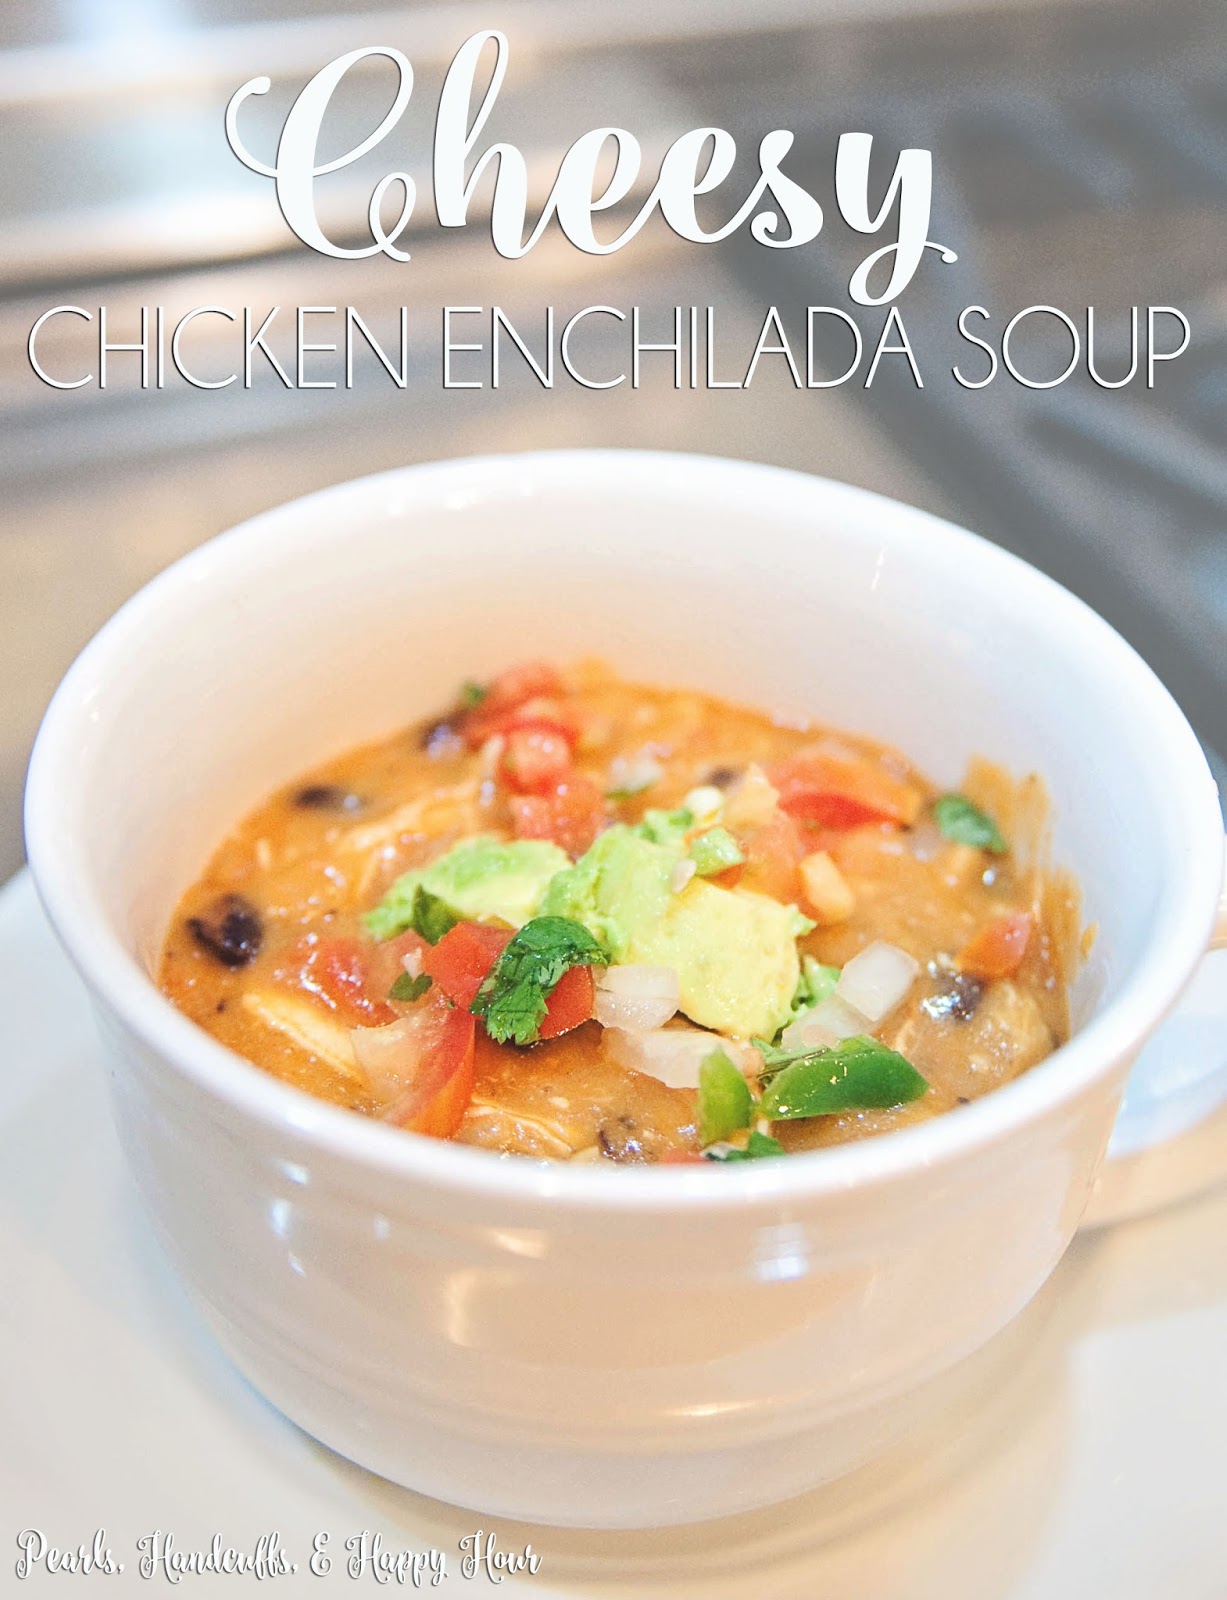

Looks delish, doesn't it?!?!

Before starting, go ahead and dice your onion and mince your garlic.  Open up all your canned goods, too.  Makes things go just  touch quicker ;)

Add the oil to a large stockpot or dutch oven.  Heat on med/high heat and toss in the chopped onion.  Saute until the onions are translucent...about 5-6 minutes...and then add in the garlic and heat for an additional minute (or until fragrant).

In the same stockpot/dutch oven, stir in the masa harina and cook for another minute or so.  

Pour in 1 & 1/2 C. of the chicken stock and whisk until the lumps are gone.

Pour in the remaining  cup and a half of the chicken stock and whisk until combined.

Now add your chicken.  We use rotisserie because it's a lot more flavorful and quick to boot.

Toss in the canned goods, too...enchilada sauce, black beans, diced tomatoes, and green chiles.  Stir until the mixture is well combined and then add the salt and cumin.  Mix until blended.

Let this mixture simmer on medium/low heat for about  3-5 minutes and stir continuously because the soup will stick to the bottom of your stockpot/dutch oven if not.  This soup is definitely on the thicker side (almost bisque-y) so you don't want a burned mess!!

Remove the soup from the heat and add in the cheese...add in just one cup or go crazy and add two.  Is there really such a thing as too much cheese (said the girl who can't button her pants)?  Stir until blended and serve after cheese has melted (about 3-5 minutes).  Of course, the block cheese (not the bag) will melt quicker because it isn't coated in that gunky stuff like the bagged cheese.  Plus, the block cheese tends to be a bit more flavorful anyway.  I've made it both ways and I can tell a bit of a difference when I use the freshly grated cheese as opposed to the cheese in a bag.  

Serve this soup right out of the pot as its OR top with any of the optional toppings mentioned above (or anything else you can think of!)  We pair ours with pico de gallo and fresh avocado and ohmiword...cheesy heaven!!  This is SUCH a delicious soup! 

Again, this soup is a little on the thicker side thanks to the masa harina and cheese.  But I don't discriminate when it comes to soup...thick or thin, I'm all in!!!!  
Quick, easy, and amazing!!!  

Be sure to put this one on the menu ASAP!


Thursday, January 28, 2016

It's Easy...and It's What's For Dinner

The easiest meals to prep and cook always tend to be my most favorite.  Don't get me wrong.  I love to put a little elbow grease into my meals when I have extra time...the juice is almost always worth the squeeze when a few extra ingredients and a little extra time is required.  But on nights when the kids have basketball practice until 7 and I still want to get something hearty and and homemade on the table before bedtime at 8, easy to prep and cook wins every time.  

This meal right here couldn't be easier.  Minimal prep time is involved which is always a bonus.  In all honesty, I found this recipe and thought is might be a little bland so I'd have to tweak it and add a few things here and there, but I was SO very wrong.  I could eat pasta every night of the week, but Mr. Spouse has never been a huge fan. Not only did he rave about the meal as he was eating, but he took it to work for leftovers the next day and that says A LOT because that sweet man is not a leftover kinda guy (saves more for me!! ;))  

CHICKEN FAJITA PASTA
2-3 boneless, skinless chicken breasts (cubed or sliced)
2 TBSP. Olive oil
1 yellow onion, peeled and sliced
1 orange bell pepper, sliced
1 yellow bell pepper, sliced
1 red bell pepper, sliced
1 box (1lb.) penne pasta
2 TBSP. Chicken Fajita Seasoning
1/2 C. + 2 TBSP. heavy whipping cream

First thing's first.  Cook pasta according to package directions, drain, and return to pot.  Set aside.

Next up slice your onion, bell peppers, and chicken.    As you can see, mine came out more like thinly cut cubes.  It won't affect the flavor, so cut 'em how you want 'em.

Now add two tablespoons of olive oil to a large pan and heat on medium/high heat.  Add in chicken and stir to coat in oil.  Sprinkle 1 tablespoon of the fajita seasoning into the pan and stir to coat again.  Cook for about 6-7 minutes or until chicken is pretty much cooked through.


This is my personal favorite fajita seasoning.  There may be better out there, but this one is always available in my area and I love the flavor it adds, so this is the one I like using :) 


Once the chicken is cooked through, toss in the onion and bell peppers.  Stir to combine and reduce the heat to medium.  Cover with a lid and heat through until the onion and bell peppers are soft.  Keep an eye on the chicken mixture and stir as often as needed to prevent sticking to the pan.  I probably let mine simmer for about 10 minutes or so.  


Once the onions and bell peppers are soft, add in the heavy cream, cooked pasta,  and the remaining tablespoon of fajita seasoning.  Stir to combine and cook on low until the cream is heated through.  

 This would be excellent topped with a Mexican cheese blend, but we used shredded parmesan and it was amazing!  Pico, avocado, and/or cilantro would be great toppings, too!!!  But honestly, this dish truly stands on it's own as is!!!  Nothing extra needed!!


Seriously though...how easy was that?!?!?!  Total prep time was maybe 10ish minutes or so?!  Not too shabby!!!  Like I said earlier, I really thought I'd have to add something extra to give it more flavor, but I couldn't have been more wrong.  It was seriously perfection just the way it was!! And the fact that Mr. Spouse ate it for leftovers spoke volumes.  This will be appearing on our dinner table a lot more often!!!  I love finding new recipes that aren't just easy, but delicious as well!!!  YUM!

Thursday, October 22, 2015

Slow & Easy

For the past few weeks some sort of soup has been on the menu at least once a week.  NOT because the weather is telling me it's time for soup, but because I've been craving soup like crazy.  I love soups.  They're typically easy to prep and they make the best leftovers.  And y'all know how I love my leftovers. In fact, soups are one of the only leftovers Mr. Spouse will actually eat and enjoy.

We have this great little Mexican restaurant here in town that serves the most amazing Chicken Tortilla Soup with avocado.  I could eat it every single night and not get tired of it...I think ;)  I'm typically a chicken flautas or beef fajita tacos al carbon kinda girl when I'm dining on Mexican fare, but for the past 3-4 months I find myself ordering only soups when we eat out.  I mean let's be real.  We stuff ourselves silly on chips and queso anyway.  I don't need to order a big meal and then leave more than half on my plate, but I can take down a soup like nobody's business.  Especially the chicken tortilla soup at IJ's.  Delish.

It was no surprise to my husband that I was anxious to try out this recipe when I found it.  I was hoping to recreate my favorite restaurant style soup and he could tell how excited I was to do so.  This is definitely not anything like IJ's chicken tortilla soup, but y'all...it's pretty darn amazing.  This will definitely be a go-to in the months ahead!  And the best part about it is that it can all be thrown together in the slow cooker and waiting for you when you get home from a long day's work :)  Aren't those the best kind of meals?!?!?!

SLOW COOKER CHICKEN TORTILLA SOUP

2-3 boneless, skinless chicken breasts
1 (15 oz.) can diced tomatoes
1 (15 oz.) can red enchilada sauce
1 medium yellow onion, chopped
1 (4 oz.) can diced green chiles
2 cloves of garlic, minced
1 & 1/2 C. water
1 (15 oz.) can reduced sodium chicken broth
1-2 chipotles in adobo sauce (from the can), chopped
2 tsp. ground cumin
1 tsp. chili powder
1/4 tsp. ground black pepper
1-2 whole bay leaves
Cilantro, chopped (optional - to taste)

Optional toppings:  sour cream, avocado, shredded cheese, tortilla strips


While the list of ingredients may seem lengthy, prep time is not.  You'll need to chop your onion & chipotle peppers and mince your garlic (or use the already minced version in a jar).  And that's about it.  

Take ALL of the ingredients (except for the cilantro) and add them to the slow cooker.  I added everything except the chicken at first then mixed until combined....then I tossed in the chicken.

Cook on LOW for 7-9 hours or on HIGH for 3-4 hours.  When the soup is ready, remove the chicken and shred.  Return back to the slow cooker, discard the bay leaves, and add in the cilantro.  Mix until combined.  

You can serve with any of the optional toppings mentioned above.  I thought it was delicious with a tiny little dollop of sour cream!  I decided to forego the tortilla strips, but Seeded at the Table includes a simple way to make your own in her recipe, so make sure to check that out if you love some added texture and flavor in your soup :) 


Go ahead and dust off the slow cooker!!!  This recipe will be sure to keep it busy!!!
Absolutely DELICIOUS!!!!!

Thursday, September 17, 2015

A Quick & Easy Weeknight Meal

It's been a busy week here at the house.  Trying to maintain my sanity while the last little bit of our bathroom is finished.  The painter was here yesterday and on Friday our shower glass was installed!!  PRAISE JESUS!!!!  We can finally shower in our bathroom!!! 


I figured I'd go ahead and start decorating for Halloween since I've been home all week with the contractors.  Yes...it's soon.  Yes...it's still 90 degrees here.  But I like to decorate early and that's just what I did.  My boys couldn't be more excited and I loved giving our decor a little facelift.


I also started a new Bible study on Monday.  So far, I'm LOVING it. 


And, of course, spending tons of time with these two crazies (and my photobombing mom) ;)


Now let's move onto my favorite subject....FOOD!!!!!

I know I say this about everything so this statement may not hold very much water, but this might be my new favorite dish (for the moment).  I found this recipe while browsing through Pinterest the other day and it did NOT disappoint.  Even better than I could've imagined!!!  It was so quick to prep and cook...perfect for a weeknight meal when time isn't a luxury you can afford.  Not only is it quick and easy, but it's insanely delicious, too!!!  

BROCCOLI AND CHICKEN STIR FRY

1 tsp. olive oil
2 boneless, skinless chicken breasts - cubed
2 red bell peppers, cut into thin strips
2 C. frozen broccoli florets, thawed
1 tsp. cumin
1/2 tsp. cayenne pepper
1/2 tsp. paprika
1/2 tsp. garlic salt, optional (I used it)
1/2 tsp. chili powder, optional (I used it)
1 C. cooked brown rice, optional (I used it)


First things first.  Slice your peppers and cube your chicken.  If you're adding the brown rice to this dish, go ahead and cook that up, too.

Add the oil to a large skillet or wok and heat on medium high and add cubed chicken.  Cook until chicken is heated through and lightly browned on the outside.

Add peppers and broccoli to the pan of chicken and cook until the veggies are browned...about 10ish minutes or so.

Add the cumin, cayenne, paprika, garlic salt, and chili powder to the veggie & chicken mix.  You'll want to add  about 2 TBSP.  of water to the skillet to help coat everything with the spices. Mix well until combined and coated.  Heat until the water is absorbed and then toss in the cooked rice.  Mix until combined and then remove from heat.

Serve and ENJOY!!!

This would have been just as good WITHOUT the rice, but I know my husband and after a long day in the training room and on the field, he needs a meal full of protein AND carbs to fill him up. I can't say enough good things about the flavor!  I love anything with a Tex-Mex flair and everything in this recipe blends together perfectly.  

Adding all the spices definitely upped the heat, so if you're wanting to tone down the spice, leave out the chili powder and decrease the amount of cayenne.  We love our food hot and spicy, so this was perfect for our taste buds.  Our boys didn't eat what we were eating because I'm contending for mother-of-the-year and chose to be a short order cook for them instead.  Sometimes the battle just isn't worth it ;) 

Friday, May 29, 2015

A Summer Salad with a Mexican Flair

We're on the last Friday of the school year and I couldn't be happier.  I'm ready to kick off summer and spend some time with my boys.  I'm sure my tune will change come August, but for now I can't wait to have them home.  The other selfish part of me can't wait to sleep in a little longer.  My internal alarm clock is set for 6:30, but I can usually silence that and sleep a couple of extra hours when I don't have to be awake :)  My boys are finally getting to the age where they sleep a little longer in the mornings, too.  And when they do wake up before us, they're really good about finding something to do...like playing with their "guys" or drawing.  

We got to celebrate our oldest yesterday and watch him receive an award for "bookworm of the class" during his award ceremony at school.  He was SO excited.  He's my extremely tender-hearted one and when he found us after the ceremony he had tears in his eyes.  I asked him if he was upset about his award and his response was, "No.  I'm half happy crying/half sad crying.  I'm excited about my award, but sad first grade is almost over."  Bless him.


I took him out for a little one-on-one time after his awards ceremony.  Dad had to go back to work and I thought it would be a great afternoon for some ice cream and some fun at the park.  He was beside himself.  He loves our date days.  So do I.   I was really proud of myself for resisting a DQ vanilla waffle cone when I had the chance to indulge.  That's a rareity. I came home and whipped this dish up instead.  And the best part was the lack of guilt I felt after eating :)  Win/win....but I'm still thinking about that waffle cone.  

CHOPPED SPINACH SALAD WITH MEXICAN SHRIMP and CILANTRO AVOCADO DRESSING

1 lb. raw (peeled & deveined) shrimp
1/2 tsp. cumin
1/2 tsp. coriander
1/2 tsp. paprika
1/2 tsp. chili powder
1/2 tsp. garlic powder
1/2 tsp. onion powder
3/4 tsp. salt
pinch of dried oregano
2 tsp. coconut oil
2 TBSP. low sodium chicken broth
2 cups baby spinach, chopped
1/2 cup corn, drained
1 cup black beans, rinsed & drained
1-2 avocados, chopped
1/4 cup chopped cilantro


First up, let's prep the shrimp.  This will take no time once you get it going.  Love these kind of meals!

There was no one at the counter when I tried to order my shrimp, so I opted for a bag of frozen raw shrimp instead.  Once they were thawed out, I peeled and deveined them.  That took the longest.  

Now mix together all the spices in a large bowl (cumin, coriander, paprika, chili powder, garlic powder, onion powder, salt, oregano) and then add the peeled shrimp.  Toss to coat shrimp thoroughly.  

Add the coconut oil to a large pan and heat on medium high.  When the oil is heated, add the shrimp to the pan.  Be sure that each of the shrimp are sitting in the pan and not on top of each other so that they all cook evenly.  Heat until shrimp are cooked through (pink on the outside, white on the inside), transfer to a plate/dish, and set aside.  

Pour the chicken broth into the same pan and heat on low.  As the broth heats up, start scraping the spices from the pan and mix to combine with the liquid.  Continue to mix the liquid with the spices until the broth thickens.  Turn off the heat and return the shrimp to the pan.  Mix the shrimp with the broth mixture until coated.  

Now go ahead and chop your spinach then transfer to a large bowl.  Add the drained/rinsed beans & corn, chopped cilantro, avocado,  and then toss in the shrimp.  Mix together until combined.  I went ahead and added about 2 tablespoons of dressing to the salad.  Instead of making my own dressing, I phoned it in.  This is one of our favorites.....


I'm not typically a huge fan of bottled dressings, but we absolutely love the flavor of this!!  

I also think THIS DRESSING would be amazing with this salad.  

The shrimp would definitely be delicious on their own if you aren't a fan of salads.  I *almost* served it with a side of roasted asparagus, but Mr. Spouse was REALLY hungry and I knew I needed something that would fill us up a little more.  

As you can see, quick and easy!  And the flavor was outstanding.  We'll definitely be revisiting this salad in the warm summer months to come!!!

I'm also planning on trying out some of these mouthwatering salads I've been pinning...223 of them to be exact.
  If I can get to even 5 of them, I'd be ecstatic ;)  We all know how that works!!  

Thursday, April 30, 2015

Taco Salad & A Trip Down Memory Lane

When my husband and I went on our very first date, he took me to this old prison-turned-restaurant in downtown McKinney.  He won MAJOR bonus points for originality and creativity. It was called "Prison Bar and Grill".  I should've been a little frightened, but I thought it was the coolest thing!!!! You could even sit inside of old cells and eat.  It was the most memorable first date ever and it clearly won me over because I accepted his proposal one year later to the date.  The restaurant has since closed, but downtown McKinney turned into our little spot after that very first date.
We moved to McKinney...brought our two sweet boys home in that little town...and celebrated every anniversary right down the street from that old prison bar and grill right there on the square at Rick's Chophouse.  Before we moved to Houston, we spent lots of date nights and family days on the square.  

There was a little Mexican restaurant there (I heard it closed) that was just amazing.  I can't remember the name to save my life, but it was right across the street from my favorite antique store.  We liked to antique shop for just a bit...or as long as the kids wouldn't scream...and then head across the street to eat.  We ate there quite often.  They had the most AMAZING taco salad.   In fact, I think that's the first place I ever had a taco salad.  When I eat Mexican, you can always guess exactly what I'm going to get...either beef fajita Tacos al Carbon or some type of street taco.  I don't venture out much because I'm predictable and boring.  However, I always got the taco salad at this little Mexican restaurant.  I'm typically more of a "beef girl", but their shredded chicken was out of this world.  SO amazing.  I'm taking the boys up to Dallas this weekend and can't wait to stop by the square for some good food and a little trip down memory lane. I just wish that restaurant were still there!!!

When I found this recipe, I was hoping it would be just as good as the taco salad on the square.  While it wasn't exactly the same, I was pleasantly surprised at how delicious it was and knew this would be my new go-to taco salad.  We have this at least once a week and...so far...I haven't tired of it yet.  Always a good sign, right?!?!  HA!

SHREDDED CHICKEN TACO SALAD
2-3 boneless, skinless chicken breasts
1 can of black beans, drained and rinsed
1/2 tsp. Nature's Seasoning
1 TBSP. chili powder
1 tsp. ground cumin
1/4 tsp. ground chipotle chili peppers
1 tsp. garlic salt
2 Cups of water
3-4 green onions, chopped
1 green bell pepper, chopped
1 red bell pepper, chopped
1 head of iceberg lettuce
Buttermilk Ranch dressing


First things first.  When I make my chicken, I like to put it in the crock pot and let it simmer all day long while I'm busy working and/or running errands.  One less step I have to go through when it's actually time to start cooking!  I typically season my chicken breasts (thawed, not frozen) with a little salt, pepper, & garlic powder then place them in the crock pot and cover them with chicken broth.  Then I cook on low for about 8 hours.  When the chicken is cooked through, I drain the broth, return the chicken to the pot, and shred with my hand mixer.  Done and done!  

When you're ready to prep the salad, here's what you'll need to do.

Transfer the shredded chicken to a large skillet.  Add the black beans and toss in all the spices & seasonings...Nature's Seasoning, garlic salt, chili powder, cumin, and ground chipotle chili peppers.  Mix well to combine and then cover with 2 cups of water.  Turn heat to medium and let simmer until all of the water has evaporated (about 8-10 minutes give or take).  Stir continuously to prevent anything sticking to your skillet.

While the chicken mixture is simmering, chop your veggies (red & green bell peppers, green onion).  Then go ahead and chop the lettuce and place in a large bowl.  Toss in the veggies.  

Once the water has evaporated, transfer the chicken mixture to the bowl full of lettuce and veggies.  Mix well to combine.  

I personally prefer this salad with homemade buttermilk ranch.  I can't handle the ranch in a bottle!!  Top with your choice of fixin's...shredded cheese, sliced cherry tomatoes, tortilla strips, etc.  I typically just top mine with a little sprinkle of shredded cheese and call it a day.

I can't tell you how much I LOVE this salad!!!  You'll just have to try it for yourself to see what I mean.


Of course, you can always sub the chicken with ground beef or ground turkey and it's pretty much just as delicious.  The secret is to ditch the pre-made taco seasoning.  This little combo of spices is SO much better!!!!  

Thursday, April 16, 2015

A Tex Mex Throwback

I was cleaning out some of my cabinets the other day and ran across a little box full of recipe cards. I remember getting this when I got married 11 years ago. All the women in my life knew my cooking skills were limited to Hamburger Helper and frozen pizza and they were trying to set me up for cooking success.  Bless.

It took forever for me to learn how to cook something without burning it.  Or to find "green onions" in the grocery store. (I was #sosmart...I'd sift through all the yellow onions trying to find the greenest.  Did I just admit that?!)  To say my kitchen skills were sub-par is the understatement of the century.  When I finally did learn a thing or two about following a recipe, I stuck to a very limited menu and repeated it week after week for the first 3-4 years of our marriage.  It looked a little something like this...

Monday: Fiesta Chicken
Tuesday:  Taco Salad
Wednesday: Hamburger Helper (beef stroganoff, please!!)
Thursday: Chicken Squares
Friday & Saturday:  Out to eat
Sunday:  Pizza

Dear Lord.

I'm happy to say we've come a LONG way since those childless days and worn out meals.  My husband can't say the words "Fiesta Chicken" & "Chicken Squares" without inducing his gag reflex. I have the same reaction when I pass by the boxes of Hamburger Helper at the grocery store.  I'm not knockin' any of these meals, but if you eat the exact same thing every week for the first 3-4 years of your marriage, I'm pretty sure your gag reflex would go into overdrive, too :)  

All that to be said, I came across a recipe card I haven't seen in ages.  Tex Mex Chicken and Rice.  While I'm no whiz in the kitchen, I decided to add a few new things to this dish to take it from bland to grand (<<<<< see what I did there?!) and now it's a family favorite.  But I PROMISE not to keep this one on repeat :)

TEX MEX CHICKEN AND RICE

2-3 boneless, skinless chicken breasts, cooked and shredded (OR rotisserie chicken, shredded)
1 medium yellow onion, chopped
2-3 jalapenos, seeded and chopped
2-3 cloves of garlic, chopped
2 Tbsp. olive oil
1 (4 oz.) can of chopped green chiles
1 (12 oz.) can of Rotel
1 tsp. salt
2 tsp. cumin
1 (12 oz.) can of evaporated milk
2 cups shredded colby & monterrey jack cheese
1/4 C. chopped cilantro
2 eggs, beaten
2 cups of cooked rice
Panko bread crumbs (optional)


First, let's go ahead and preheat your oven to 350.

Prior to getting started, cook your chicken, shred (or shred your rotisserie chicken), and set aside  I cheated and used rotisserie.  You'll also want to make your rice and set aside, too.

Chop your onion, jalapeno, and garlic.  Put the olive oil in a pan and heat on medium/high.  Add the onion, jalapeno, and garlic to saute (about 5 minutes, give or take).  

Add the cans of chopped green chiles and Rotel to the pan and toss in the salt and cumin.  Mix until combined and let simmer for about 3 minutes.  

Add the chicken and mix to combine.  Simmer for another 3 minutes.

Now add the cooked rice  & evaporated milk, stir, and remove from heat.  Toss in the cilantro and shredded cheese and mix well to combine.

Beat two eggs in a small bowl and add to the chicken & rice mixture.  Mix well to combine and transfer mixture to a lightly greased 9x13 baking dish.  

If you're looking for a little more texture, sprinkle the top with some Panko bread crumbs.  Bake at 350 for about 60 minutes.


The addition of the egg sets the chicken and rice and makes this dish more of a meal that can be cut and served in squares.  A "thick" meal, not creamy. Amazingly delicious.
If you're wanting a creamier version of this chicken and rice dish, omit the eggs and replace the evaporated milk with  1 & 1/2 cups of half and half or whipping cream and reduce the baking time to about 20-25 minutes (or until bubbly). 
We've had it both ways and both versions are delish.  Just depends on the kind of texture you're wanting!!!  

This is just the kind of throwback I'm happy to revisit!!!!

Friday, April 10, 2015

Two Meals, One Leftover

If y'all read my post on Monday, you might remember me talking about the abundance of food we had on Easter Sunday.  Food for days.  I was in charge of making the world's most simple and savory pot roast. I only made one, but at the very last minute I got nervous not thinking we would have enough so I sent Mr. Spouse back to the grocery store to grab another.  Between the first roast, the ham, the pork, and the chicken and sausage, we didn't even make a dent in the last-minute-pot-roast I insisted on rushing out to get before the festivities began. 
 #sosorryMrSpouse

My husband isn't usually a leftover kind of a person.  He may be okay to eat leftovers for lunch the following day, but anything more than that probably won't happen.  I, on the other hand, could eat leftovers for days...especially when said leftovers are in the form of pasta.  We had this crockpot full of pot roast that wasn't even touched and I wasn't about to let it go to waste, so you can imagine how elated I was when Mr. Spouse said, "Don't go grocery shopping this week...let's just eat the pot roast for dinner."  WHA?!?!?!  I mean, I was definitely jumping for joy at the though of not having to run out for more groceries, but I also was thinking I might not want 5 full days of pot roast for dinner (as much as I do love leftovers). 
#overkill

I really do love pot roast.  Especially this simple & savory version.  But lawd.  Needless to say, it was of the utmost importance that we repurpose our protein so that we wouldn't tire of it.  Mr. Sposue ended up working late 2 nights this past week (spring sports are always a killer), so I only had to come up with two new-to-us meals.  I enjoyed the pot roast in all it's simple glory the nights he was working, but I was ready to change it up by the time Wednesday rolled around!!!  

If you have some leftover pot roast hanging around, maybe consider repurposing it for either of these two meals!!!  


When I lived in Dallas, I taught in Plano for the first 7 years of my teaching career.  We loved to enjoy Friday Happy Hours at the BEST little restaurant in old downtown Plano...Kelly's Eastside.  They always had the most delicious happy hour fare...for FREE!!!!! GAH!!!  I would always get the brisket quesadillas.  ALL of their food is insanely amazing, but those brisket quesadillas.  LAWD.  That was also one of our go-to post Sunday church meal spots, too.  My whole family loved it.  I miss that restaurant like crazy!

I wouldn't have thought to have brisket in my quesadilla, just like I wouldn't have imagined pot roast in quesadilla form either.  But that's just what I did.  Let's just say I was missing Kelly's and hoping I could kind of recreate that magic in my own kitchen.  I didn't come close, but these pot roast quesadillas were SO good!!!  

POT ROAST QUESADILLAS
2 flour or whole wheat tortillas
Shredded colby & monterrey jack cheese (to taste)
Pico de gallo (to taste) 
Pot Roast
Pot Roast gravy
Cooking spray

I used flour tortillas for this dish and sprayed the cooking spray on one side of each tortilla.  Place one tortilla in a lightly greased skillet and then take some of that gravy from the pot roast (we had tons leftover from the simple and savory recipe) and spread a thin layer on the bottom of the tortilla.  Top with the shredded cheese, pot roast, and then the pico de gallo.  Turn on the heat to a medim/high temperature.  Spread a thin layer of the pot roast gravy on the other tortilla and then place that on top (sandwich style).  Allow time for the bottom tortilla to brown and using two spatulas, carefully turn over to brown the other tortilla.  Heat until both sides are brown and cheese is melted.


Let me just say it again.  These were SO good!!!  I loved the addition of the pico de gallo...I could eat it with everything.  I typically get the pre-made tubs at the grocery store.  This was a definite winner and one we'll be sure to recreate when we have pot roast leftovers in the future!!!


I was considering a pot roast panini of some sort for last night's meal.  I'm sure that would've been great!  But we just had quesadillas the night before, so I wanted something a bit different that would incorporate more than just the pot roast and another helping of cheese and gravy.  I had a box of puff pastry shells I bought for something totally different, but I figured it would be fun to use them for this meal instead.  I also had a tub of mashed potatoes (you know those Country Crock refrigerated tubs?! #cheating) and wanted to use those as well.  Enter the Pot Roast Puff Pastry Bite.  


POT ROAST PUFF PASTRY BITES
Puff Pastry shells
Mashed Potatoes (homemade or refrigerated)
Pot Roast
French Fried Onions (optional)

This is too easy not to try!!!  Bake the puff pastry shells as directed on the package.  While the pastry shells are baking, heat up your pot roast and leftover or refrigerated mashed potatoes.  Remove the pastry shells from the oven and hollow out the center (just remove the tops and the doughy filling).  Place a spoonful of the mashed potatoes in the hollowed out center of the pastry shell.  We filled ours to the top, of course.  Then place a generous amount of the pot roast on top of the potatoes.  We had some leftover french fried onions from the green bean casserole we made on Sunday, so we put those to good use to and crumbled them right on top of the pot roast.  


They really were the perfect little bite!!  The pastry shells stayed intact and we were able to eat them just like we would a sandwich.  Mr. Spouse returned for 3rds and piled his high, so a fork and knife were essential for that serving :)  I absolutely LOVED the different textures of this meal and the flavor...well...OUTSTANDING.  This made the perfect dinner servings, but if you were so inclined, I could see these being served as a generous appetizer, too.  We will DEFINITELY be revisiting this meal in the future!!!  


Thursday, April 9, 2015

Let's TACO 'Bout It

There's just something about a grilled cheese sandwich, isn't there?!  Or am I the only one with such strong feelings about them?!   My love for this age old classic has only grown stronger through the years.  My mom used to make the best grilled cheese sandwiches for us growing up.  She'd even add copious amounts of ham and that would sweeten the sandwich all the more.  If there's a grilled cheese sandwich on the menu when we're out to eat, you can bet that will be my choice each and every time.

I remember being in Chicago with Adam a couple of summers ago and we ate out the whole time we were there.  If I wasn't eating pizza, I was dining on grilled cheese....and the occasional hot dog (HELLO, Portillo's!!!!!!!)  Can you tell I have the taste palate of a 5-year-old?!  Some things never change, I guess :)

All that to be said, I do love a great variation on the tried and true classic.  THIS ONE is one of our favorites.  Bacon, avocado, and cheese?!  Does it really get much better than that?!?! Why yes...yes it does.  And it combines one of my favorite flavor profiles with all the gooey goodness of said cheese. 

 Enter the Taco Grilled Cheese.


TACO GRILLED CHEESE

2 slices of either sourdough or potato bread
Butter
Fiesta Blend shredded cheese, to taste
Taco Meat
Pico de Gallo
Guacamole
Sour Cream
Salsa


Okay.  This dish deserves a little discussion.  

First up, you'll want to prep your taco meat (brown your ground beef and add in the taco seasoning...y'all know what I'm TACO'n about ;) Hahaha.  

Once your meat is good and ready to go, set it to the side and take out your bread.  Butter one side of each slice of bread (just like you would if you were making a traditional grilled cheese sandwich).  

Now...you can really prep this sandwich to your liking and pretty much any way you want it, but I'm going to share with you what I did to mine.  

I took about 2 spoonfuls of the taco meat and mixed it with just a little dollop of sour cream.  I sprinkled shredded fiesta blend cheese on one slice of bread and topped that cheese with the taco meat/sour cream mix.  I took a smidge of guacamole (pre-made) and spread a light layer over the taco meat.  I LOVE pico de gallo, so I tossed on quite a bit of that over the guac.  Then I topped that with the other slice of bread. 

As you can imagine, I had a pretty thick sandwich.  I couldn't imagine grilling it in my little skillet, so I used my panini press instead and it worked like a charm!!!!  The *perfect* sandwich!!!

My husband requested everything I had on mine with the addition of salsa.  I love salsa just as much as the next Tex-Mex lovin' person, but I didn't want my sandwich to be too saucy, so I just poured a bit on my plate and dipped my sandwich instead.  YUM!!!!!!

Of course, this is one of those meals I'd love to have on the menu every week.  Heck...I'd love to eat this every single night!  HA!!!!  However, this is one of our indulgences and as you can imagine, we definitely INDULGE!!!!  I can't begin to tell you how unbelievably delicious this sandwich really is!!!  All the happiness of a taco in between two slices of buttered, grilled bread.  Heaven.  Absolute and total heaven.  As my 7-year-old would say, "it's a party in your mouth!!!!"  Yes, my friends.  A fiesta in your mouth for sure!!!!

Thursday, November 6, 2014

KWEENO For The Win!

The last time I posted a recipe about quinoa, my sweet friend, Meredith, posted this commercial on my wall...


I laughed WAY too hard.

And I still do.  Cracks me up every time I play it.  Hahahaha!!!!

We've been eating A LOT of quinoa lately.  I mean, shoo.  We might as well.  I paid enough for it and the bag holds at least 10 servings, I swear.  #quinoafordays

This dish makes enough to feed a small army.  If only my boys would partake in the servings.  They feel a lot like the KWEE-NO guy in the commercial..."what the heck is this anyway?!?!?!"  Not that they'd eat it even if they could figure it out, but still.  Heck, I'd love for them to eat hamburgers with us!!!  I rest in the idea that my boys won't be 25 with the taste palate of a 2-year-old....or will they?!?!

Anyway, like I was saying before, this recipe makes quite the serving.  And it's so delicious, too.  If you haven't made the plunge to serve kweeno at your house, you really should dive in.  This is the *perfect* quinoa starter recipe (in my opinion).  Packed full of flavor and SUPER easy!!!  

QUINOA & CHICKEN ENCHILADA CASSEROLE

1 1/4 C. quinoa
2 C. chicken broth
2-3 boneless, skinless chicken breasts, cooked and shredded.
1/2 tsp. olive oil
1 clove garlic, crushed
1 (16 oz.) jar of salsa {we used Joe T. Garcia}
1 (10 oz.) can red enchilada sauce
1 (4 oz.) can diced green chiles
1 (14 oz.) can of black beans (rinsed & drained)
1 (14 oz.) can of corn, drained
1/4 C. chopped fresh cilantro
1 1/2 C. shredded Mexican/Fiesta blend cheese
Avocado, diced {for garnish, optional}
Scallions, diced {for garnish, optional}


First up, let's cook the KWEENO...ahem, QUINOA.  I like to cook mine in chicken broth and add a little garlic and onion powder in as it's boiling.  It helps to cut down on the bitterness.  So, combine the quinoa and chicken broth in a pot, bring to a boil, reduce heat, & simmer according to package directions.

At the same time, cook your chicken.  If you're smart, you'll already have yours cooked and shredded...or you'll take it easy and shred a rotisserie instead.  In that case, you would be #winning. If you're cooking it, shred it when it's ready and set aside.

While the quinoa is a-cookin', go ahead and prep the rest.  There will be minimal prep...hence the reason this is a great starter meal if you're just getting into quinoa.

Saute the garlic in the olive oil until fragrant...about 1-2 minutes.  Add the salsa and the enchilada sauce to the same pan, mix until combined, and simmer for about 5-10 minutes.  

Now take the quinoa you cooked earlier and dump it into a large bowl.  Toss in the shredded chicken, too.  Add the green chiles, black beans, corn, cilantro, and 1/2 C. of the cheese.  Mix until ingredients are combined.

Remove the enchilada sauce/salsa mix from the heat and pour over the quinoa mixture in the large bowl.  Stir until the quinoa mix is well coated with the salsa/sauce.  

Transfer the quinoa mixture to a greased, 9x13 baking dish.  Top with the remaining cheese and cover with foil.  Bake for about 20-25 minutes (or until cheese is melted) at 400 degrees.


If you so desire...which we did, of course ( I mean, go big or go home, right?!?!)...go ahead and top your serving with diced avocado and scallions.  

Seriously, y'all.  SO delicious!

I'm really emphatic about explaining the meals I cook.  Not so much articulate, but emphatic, yes.  AMAZING!!!!  Remember how much I love exclamations?!  Because I do!!!  And I love this dish just as much!!!  

If you're just boarding the quinoa train, or if you've had your ticket for years, get on this dish as soon as you can.  Simple, easy, and tasty....a winning combo, for sure!


KWEENO FOR THE WIN!!!!


Wednesday, September 24, 2014

After School Special

So this little recipe is an oldie, but goodie.  I posted this one about 3 years ago, but we just had it again for dinner the other night and I figured it would be a good excuse to update those hideous, unappetizing pictures.  {I know these aren't much better, but trust me when I say they're not nearly as icky}.  Yuck.  Our little family loves this dish!  {By "our little family", I mean me & Mr. Spouse.  I long for the day that my boys will touch my dinners with a ten foot pole.}

********************************************
While my sweet friend, Courtney, & I wait for our walkers to go home after school, we talk about FOOD!  I think that’s our favorite  subject ;)  We like to exchange recipes & the other day she was tellin’ me about a recipe I just HAD to make!  Courtney likes this one because you can make it all in ONE pot!!  HA!!  I like the way she rolls :)  Adam liked it so much he had leftovers the next day and he very RARELY eats leftovers.  Thanks for the DELISH recipe Courtney!!!

 
SKILLET CHICKEN OLE!

2 Tbsp. Extra Virgin Olive Oil
3-4 cloves garlic, crushed
1 small yellow onion, chopped
2-3 chicken breasts, cubed {small bite-sized pieces}
1 pkg. frozen corn
1 can Rotel {original}
sliced black olives, to taste {optional}
Cooked Rice {I made 2 boil-in-a-bags :)}

Let's get this skillet party started.

Take 2-3 chicken breasts and cut them into bite-sized pieces and chop up your onion.


Add olive oil to your skillet and heat on medium high.  Add chicken, onion, & garlic.  Reduce heat to medium.  Stir often and simmer until chicken is cooked through.  Once the chicken is ready, drain the oil and return chicken/garlic/onion to pan.

Add Rotel & frozen corn.  Simmer on low heat for about 15-20 minutes, stirring often. As you can see, we didn’t add the olives.  Adam decided to veto that portion of the recipe because he’s not a fan.  Courtney said it’s REALLY good with the olives!!  I’ll have to try it when he’s not around :)


Turn off heat and add 1 – 1 1/2 cups of cheese....or more.  Whatever floats your boat.  We used Colby & Monterrey Jack :)  Stir until cheese is well blended & melted. 


Now, if you know how to make rice, kudos to you.  I DON’T.  SO…I made two bags of boil-in-a-bag rice.  Quick & easy.  Add the skillet chicken mix to the rice & stir.  OLE!   SO flippin’ yummy.  The corn adds a little sweetness that I wasn’t expecting…m-m-m-m-m.  This meal is definitely a keeper!!!!  And Courtney was SO right…I love it even more because I can make it all in one skillet!  Easy weeknight dinners requiring minimal dirty dishes are my absolute favorite :)  I think you might agree, too!


And I'm linking up with Andrea from Momfessionals today for her monthly Recipe Club.  There are some good ones over there, so y'all head over and check 'em out!


Tuesday, September 9, 2014

Redemption.

I'm a fan of quinoa.  A BIG fan.  I really like to say the word almost more than I like eating it. 

KEEN-WAH.  

Say it with me.  KEEEEEN-WAHHHHHHH.

It reminds me of my friend, Meredith.  I remember when quinoa started to become a "thing".   I had never heard of it and she was telling us all about it and how she had made a recipe or two with it. I remember balking at the price tag.  NO WAY would I spend $10 for a bag of....what was it anyway???  Rice??  Pasta??  

I started to look for it in the store and couldn't remember how to pronounce it.  

KWEE-NO-UH???  

KWIN-OH??? 

KEEN-WHA???

If I can't pronounce the dang thing, there's no way in heck I was going to eat it.  I'd try to remember how Meredith said it and she'd laugh thismuch when I'd ask her.  I can't look at quinoa without thinking of her...and I sorta love that because she's one of my most precious friends and thinking about her and her contagious laugh makes me smile.   

KEEN-WAH.

I've since tried quinoa and loved...errr, LOVE....it.  I really do.  It can be a little bitter, so I always cook it in chicken broth and add a few little spices to cut the tang.  I love that there are a MILLION ways to make it and it's packed full of protein and goodness. 

KEEN-WAH.

After posting such a sinful little snack yesterday, I knew I needed to add something redeeming today.  I find myself getting many of our dinners from one of my favorite food blogs, Damn Delicious.  If you haven't visited before, you should start.  After trying her Carnitas Avocado Pizza, I knew this dish wouldn't disappoint either...and I was SO right.  More so than I could've even imagined.

SOUTHWESTERN QUINOA STUFFED PEPPERS


3 Cups cooked quinoa {which is about 1 cup uncooked}
1 (4oz.) can diced green chiles
1 Cup frozen corn
1/2 Cup black beans, drained & rinsed
1/2 Cup petite diced tomatoes
1/2 Cup shredded pepper jack cheese
1/4 Cup crumbled feta cheese
3 Tbsp. chopped cilantro
1 tsp. cumin
1 tsp. garlic powder
1/2 tsp. onion powder
1/2 tsp. chili powder
Kosher salt & ground pepper, to taste
6 bell peppers, seeded & tops cut off

I know this ingredient list may seem like a lot, but it's not.  It's really not.  Especially when you see how easily it's all prepared.  Let's get started, shall we?!

Go ahead and make your quinoa according to package directions.  Like I said earlier, I like to cook mine in chicken broth instead of water.  I'll often toss in a little garlic & onion powder and a tiny bit of sea salt as well.  

Once your quinoa is ready, transfer it to a large bowl.  Now combine the quinoa with the chiles, corn, beans, cheeses, cilantro, & spices.  Pretty much everything except for the peppers.  Stir it all around until it's nice and mixed.


I don't know about you, but I think that looks amazing.  And it is.  

Now.  Let me just tell you that if you're so inclined, you can stop right here.  This "stuffing" is perfect all on it's own.  Since making this dish, I always have these ingredients on hand so that I can make a batch of the stuffing to keep and eat for lunch or any time I'm craving it.  It is unbelievable savory and delicious.

Now let's keep on with the recipe...

Cut the bottoms of your peppers so that they will lay flat in your baking dish.  I basically just shave off the bumps and they sit perfectly.  Cut of the tops, de-seed, and discard.  Fill the peppers with the quinoa stuffing and make sure you're generous with the filling.  You want as much of that goodness as you can fit inside.


We used red & green peppers...as you can see...and I definitely preferred the red.  They were both amazing, my palate just tends to prefer red a little more :)

Bake at 350 for about 25-30 minutes.  If you can wait that long.


This is the kind of recipe that makes me sad I didn't heed Meredith's advice and try quinoa sooner.  


At the request of Mr. Spouse, next time I make these I'll be adding shredded chicken to the stuffing.  He really enjoyed the meal...he had 3 peppers, for the love!!!....but he said it would've been a bit more satisfying with the addition of a little chicken.  

Noted.

If you're completely opposed to quinoa, I think the flavors would really be a perfect pair with rice, too....but I'm sure you didn't need me to tell you that ;)