Showing posts with label desserts. Show all posts

Thursday, October 19, 2017

Chocolate Chip Pumpkin Cookies

I've never been the biggest fan of anything pumpkin flavored.  Not pumpkin pie.  Nor pumpkin cheesecake.  And especially not pumpkin spice lattes.  The flavor is just "meh" to me.  All that to be said, my whole family tends to love the taste.  And from the looks of social media, it appears that the rest of the free world feels the same way as my family.  #oddmanout

A few years ago I baked this delicious chocolate chip pumpkin bread and...shockingly...absolutely LOVED it.  


We've been on a bit of a cookie kick lately and I wanted to take that same bread concept and bake it in cookie form.  I don't come up with my own recipes so I set out to find the perfect method already tested and tasted by one of the pros :)  And let me tell y'all right now...this one is a WINNER.  My new go-to cookie recipe. 


This batch lasted a total of 1.5 days in the house.  My husband and my boys were CRAZY about them.  And while I'm not a fan of pumpkin myself, I have to say that I was crazy about these, too.  The pumpkin isn't overwhelming, but you can definitely taste it.  They're bakery style soft and fluffy.  And even though I try *really* hard not to eat sweets during the week, these were simply irresistible.  

PUMPKIN CHOCOLATE CHIP COOKIES

1 CUP canned pure pumpkin (NOT pumpkin pie filling)
1 C. granulated sugar
1/4 C. light brown sugar, lightly packed
1/2 C. vegetable oil
1 large egg
1 TBSP. vanilla extract
1 tsp. ground cinnamon
1 tsp. pumpkin pie spice
2 tsp. baking powder
1 tsp. baking soda
1/2 tsp. salt
2 C. all-purpose flour
1 C. semi-sweet chocolate chips
1 C. milk chocolate chips

You'll only need one bowl for this, so cleaning up isn't a beast.  


In a large bowl, combine 1 cup of pumpkin, white sugar, brown sugar, vegetable oil, egg, and vanilla.  Use an electric mixer to beat ingredients until smooth.  Add in the cinnamon, pumpkin pie spice, baking powder, baking soda, salt, flour, and both chocolate chips.  Beat these in with your electric mixer, but only until combined!  DON'T overmix!!  

You'll notice that your batter seems more cake batter-like in consistency and that's exactly how it should be.  Cover the bowl tightly and chill for 1-10 hours.  I chilled mine for approximately 1 hour and 15 minutes.  

Remove from fridge and scoop out about 1/4 C. of the batter and place in a mound on a cookie sheet lined with parchment paper. This amount will yield larger, bakery style cookies.  If that's white you like, be sure to only place 6 mounds of dough on the baking sheet at a time to prevent it from running together.   

Bake for 12-15 minutes at 350.  

Remove from oven and place on racks to cool.


Truly, y'all.  These cookies are AMAZING.  If you're a fan of pumpkin...or just cookies in general...you'll want to add this to your list of things to bake IMMEDIATELY.  I'm headed out in just a bit to grab more ingredients because my boys are begging for more.

I'm so grateful for people who actually know how to combine the right ingredients in just the perfect way so that I could, in turn, enjoy the tastiness without any of the frustration :)  Chelsea's Messy Apron knocked this one out of the ballpark.

These cookies are a bit thicker than your regular chocolate chip cookies.  And they're so unbelievable fluffy and moist.  Almost like cake, but not quite.  Somehow they're both dense and airy.  Easy to prep and bake, quick to disappear.  

8 very enthusiastic thumbs up from this family of four! 

Friday, October 7, 2016

KIDding Around

It's been quite the full week and I guess there's no better way to start a new month, right?!  We started with a little flag football game for this kid...


baby showered a soon-to-be-new kid (a new nephew!!!)....


adored the most precious kid work at Open House....


and acted like kids at "Luke's"...


My sister and I share the same affinity for Gilmore Girls and couldn't pass up the chance to enjoy a hot cup of coffee served with a side of nostalgia when these little pop-up diners made their way to town on Wednesday.  It was definitely over-hyped, but fun nonetheless. We walked away with the itch to re-watch Gilmore Girls starting from season 1, a commemorative coffee cup sleeve, and pictures to boot.   
#lorelaiandroryaremyspiritanimals

Now let's start the weekend with a kid-friendly recipe and I say that only because it's sweet as all get out and perfect for those of us who still entertain a 5-year-old taste palate. 
#allthesweets

CRACKER CRUNCH CANDY
1 sleeve of Saltine crackers (and maybe half of another sleeve, depending on the size of your pan)
1 C. (2 sticks) of butter (salted or unsalted)
1 C. + 2 TBSP firmly packed light brown sugar
1 bag semi-sweet chocolate morsels
OPTIONAL TOPPINGS:  toffee bits (yes please!), slivered almonds, and/or pecans

Please avoid this recipe if you're trying to refrain from sweets, trying to lose weight, or trying curb your sweet tooth cravings.  NONE of that is possible with this stuff on hand.  

First up, line a baking sheet with foil and spray with a non-stick cooking spray.  Then line the sheet with crackers like this...


Next up, melt two sticks of butter on medium heat in a saucepan. 


 Once it's all melted, add in the brown sugar (I prefer light, but you could use dark if that's all you have available), stir well, and bring to a boil.  Heat/boil for about 3 minutes and be sure to stir frequently to avoid burning or sticking to the saucepan.


Now remove the brown sugar/butter mixture from the heat, pour on top of the crackers, and spread evenly so that all crackers are covered in this sweet, gooey goodness.


Bake at 350 for 5 minutes and remove from oven.  

Pour a bag of semi-sweet morsels on top of the crackers and cover the pan with another sheet of foil.  Let that sit for about 3ish minutes and remove foil.  This allows time for the chocolate to melt so that you can spread it evenly over the sheet of crackers like this....


Now here's the fun part.  You could always stop at that step, but let's go ahead and just make it a bit more decadent, shall we?!  I added a bag of toffee chips to the top of the melted chocolate and then tossed some sliced almonds to the mix because I'm a huge fan of sweet & salty snacks.  Ohmiword.


Place the entire pan in the fridge and give it about 20+ minutes to allow time for everything to set and harden.  Once the chocolate is nice and firm, remove the pan from the fridge and break the crackers into small pieces.  


Aaaahhhh!!!!  SO GOOD!!!!  

We bagged up a good portion of this "candy" and took it to the boy's teachers as an Open House treat.  There was still a ton leftover, so naturally we ate most of that :)  Not sad about it.  Then I had to get the stuff out of my house because I was turning to it for breakfast, dear LORD!!!  One of my girls had a birthday dinner on Wednesday, so I went ahead and took the rest as a dessert and there wasn't a bite left in the bowl by the time the night was over!  Whew!!!  


The sad thing is that I'm already craving it again and planning on making another batch this afternoon.  Thank God for elastic waistbands because Lord knows I need them desperately :)  

Monday, October 3, 2016

Pumpkins & Apples

Since it's finally October, I can talk about all things apples and pumpkins now....right?!  Or am I too early?  Or too late?  I can never remember the proper blogging etiquette.  

I know I've mentioned it before, but just as a refresher, I'm not a huge fan of pumpkin.  I've never had a PSL (is that what all the cool kids are calling it these days?), I don't really enjoy pumpkin pie, and unless they're sitting on my front porch, I'm just not a huge pumpkin fan in general.  However, I have plenty of friends and family members who love the flavor.  And even though I'm not a huge fan of the taste, I do enjoy cooking & baking things with pumpkin for the people in my life who DO like it :) 

When I found this recipe, I knew I wanted to try it out.  And I figured the pumpkin could be substituted for apples instead, so I knew this recipe would be a winner in more ways than one.  And seriously, it was a HIT!  Grand slam, outta-the-ballpark, WINNER.  I've baked this more times than I can count in the last couple of weeks and taken it to get-togethers, potlucks, and just-for-fun type occasions.  And if you know anyone who loves pumpkins or apples, this would be a wonderful little treat to bake for them, too!  

PUMPKIN SPICE  & APPLE SPICE PULL APART SWEET BREAD

PUMPKIN SPICE PULL APART SWEET BREAD
1 (16.9 oz.) can Honey Butter Pillsbury Grands Flakey biscuits, 8 
3/4 cup pumpkin pie filling
2 TBSP. butter, melted
1/3 C. sugar
1 1/2 tsp. pumpkin pie spice
2 C. powdered sugar
1/4 C. milk
1 tsp. vanilla

APPLE SPICE PULL APART SWEET BREAD
1 (16.9 oz.) can Honey Butter Pillsbury Grands Flakey biscuits, 8
1 (15 oz.) can apple pie filling
2 TBSP. butter, melted
1/3 C. sugar
1 1/2 tsp. apple pie spice
2 C. powdered sugar
1/4 C. milk
1 tsp. vanilla

Choose the flavor you want and let's get to baking!


As you can see, not much is needed.  If you choose apple instead of pumpkin, you'll just switch out the can for apple pie filling and the pumpkin pie spice for apple pie spice instead.  YUM.


Now take each of the biscuits...8 total...and separate into two layers.  They easily pull apart because, well, they're flaky layers already.  You'll need 16 pieces for this recipe.  I went ahead and laid mine out on wax paper for easy clean-up and whatnot.


Now spread the pumpkin pie mix...or apple pie filling...on the top of each biscuit.  The recipe calls for 3/4 C. of the pumpkin pie mix, but I didn't follow that.  I just added what I thought would be tasty.   As for the apple pie filling, I went ahead and used the entire can spreading an even amount atop each biscuit.


Melt the butter and pour about 1/2 - 1 tsp. of melted butter on top of each biscuit.

Now mix together the sugar and pumpkin pie spice (or apple pie spice) until combined.  Sprinkle evenly on top of the pumpkin pie/apple pie filling.

pumpkin

apple...my favorite!!!!!

Now get ready to get your hands dirty.  For real.  

Stack four biscuits, one on top of the other.   You'll have four separate stacks altogether.

I made sure to place the top biscuit upside down on the last stack.  This will be the "heel" of your loaf :)  


Be sure to grease your loaf pan before adding in the biscuits.  
You'll have to do some finagling to fit everything in.  Place one set of biscuits in the pan at a time.  You'll need to keep the biscuits in place with one hand while adding the next set with the other.  You'll see what I mean when you start adding...it gets pretty messy really quick!  


You might have a bit of the sugar & spice mix leftover.  If you do, you can sprinkle a little bit more on top of the biscuits once they're added to the pan.  Waste not, want not, right?!?!


Bake on 350 for about 40-45 minutes or until the center is cooked through.  I baked mine right at about 40 minutes on the convection setting.  The center was baked through, but the top was a bit crispy, LOL!  I like a crispy crust, so that worked for me :)

Does that not look amazing?!  


The pumpkin pull apart bread doesn't bubble over quite like the apple bread so I would suggest placing a baking sheet underneath the loaf pan if you plan on baking with the apples.


Remove from oven and let cool.  While the bread is cooling, mix together the powdered sugar, milk, and vanilla until combined.  This glaze basically tops it all off and really sets the stage for a delicious sugar coma to take place.    Pour evenly over the top of the bread.  I didn't use all of the glaze because I felt like it made a ton, so I would say add to taste :)  You really can't screw it up!

I've baked and sampled both the pumpkin and the apple and I definitely think the apple is better, but that's my most favorite flavor to begin with, so don't take my word for it!  Mr. Spouse LOVED the pumpkin and I think he preferred that one to the apple.  In all honesty, you can't go wrong either way.  They're both delicious!!!!  

This would be a great little breakfast to bake for overnight guests, but it also makes a great little treat to gift to neighbors, friends, and co-workers....especially this time of the year! 

I love how the layers pull apart easily so you won't need a knife to cut into it.  Just the perfect little serving sizes.  I'm keeping all of these ingredients on hand so that I can whip these up at a moment's notice.  You'll see what I mean when you try it for yourself!!!  

Friday, September 16, 2016

Game Day Treats

I think I've mentioned it before, but my husband is an athletic trainer at one of the local high schools.  He's been doing this for as long as I've known him and I know I'm a proud wife, but I really must mention that he's SO good at what he does.  Not just his knowledge about injuries and treatment, but he's amazing at building relationships with his student trainers.  We miss him so much during football season when his days and nights are long and we don't see him as often as we'd like, but we know his school kids need him too and we're happy to share him for the season :)

Now that my schedule is a lot more flexible, I've gotten to know a lot of his kids and they are the sweetest.  Such good kids who work hard and deserve to be treated :)  I love surprising his kids with little treats throughout the year.  Nothing crazy fancy or anything like that, but the teacher in me really does love doing cutesy little things especially now that I don't have my own classroom.  
The first official home game of the season called for such treats.  

These would be great for birthday parties or game days, too!  So I wanted to share in case you need a few fun little treat ideas also :)

Making these football treat bags is super simple and just requires a white paint pen, a pair of scissors, brown paper lunch bags, and a little patience.  Just cut off the tops of the bags (it looks even better with jagged edged scissors) and use a white paint pen to draw on the football lacing details.  Simple, right?!  

You can fill the bags with anything, but I filled ours up with some candy, a bag of goldfish with a tag that said, "It's oFISHally football season!", blue gatorade bottles (our team colors are blue and white), and a few little football themed paper goods (napkins and paper straws). 


One year I had some extra time on my hands and even wrapped the gatorade bottles with this great football textured scrapbook paper (I drew the lacing on those, too).  Extra time doesn't seem to be happening very much lately so this year the kids just got the gatorade bottles :)  

As you can see, I also attempted football shaped chocolate rice krispie treats that year, too.  This should be in the "Pinterest Fails" category.  Looks like my 8-year-old tried to decorate those!!!  Ha!


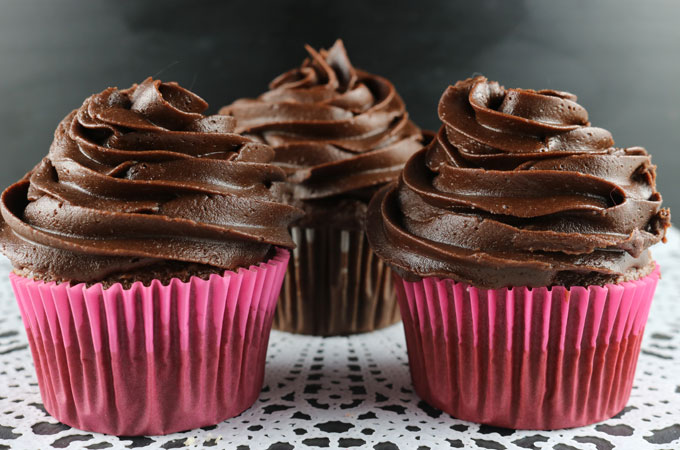
In addition to the treat bags, I made the kids some game day cupcakes this year.  Y'all...these were SO easy!  I went ahead and just used a box mix for the cupcakes, but there's nothing quite like homemade frosting, so I used one of my favorite chocolate buttercream recipes to top these off.  I baked these in green cupcake liners and used a mini closed star cupcake decorating tip for the brown piping.  I used a mini round cupcake decorating tip for the white piping.  They're not the prettiest attempt at cupcake decorating, but not a total fail either :)

All of the paper goods (straws, napkins, coasters) are from Wal Mart.  Right now they have the best game day paper goods!!! I picked up lots of extras for the season in case they stop carrying them.  We love hosting Sunday Funday and these will make for some fun little touches.


If you're looking for a great chocolate buttercream recipe, these two are the absolute BEST!!!  You can't go wrong with either!!!  I used the Two Sisters Crafting recipe for the football cupcakes and it got RAVE reviews!!!


Tuesday, April 26, 2016

Strawberry Shortcake

Have I ever told y'all that story about the time I ate a stranger's strawberry shortcake?
Well...he wasn't a total stranger.  He was my neighbor.  He lived in an apartment three floors below mine.  I didn't really know him...didn't really know his name I don't think...and he kind of creeped me out.   At the time my husband was my fiancee.  The guy creeped him out, too.

One night....right before our wedding...I was cleaning up and packing my apartment.  I left my door unlocked because my husband was going to stop by and help and he didn't have a key.  I was in my closet...biggest disaster ever...and I heard my door beep (you know that alarm sound that goes beep, beep, beep when a door opens).  SO I got up to say hello to my husband and lo and behold, it wasn't him.  It was the creepy neighbor from three floors down!!!!!!!!!

IN.MY.APARTMENT.

And I'll be danged if he didn't close the door behind him.
WTH?!?!?!

I panicked for a second because I was all, "Ummmm...why are you in my apartment?  With the door closed???"   I watched one too many Forensic Files episodes and watched way too many episodes of Oprah to be calm.  So...I pretended to be calm and walked right on over to the door while engaging him in conversation, and opened it up wide saying something like "I really need some air!  It gets so stuffy in here!"  I didn't want him to think I was nervous and make some crazy kind of move.  Then I proceeded to tell him my husband should be there any minute.  He wasn't expecting that.  

So he started to leave, but not before giving me a bowl of homemade strawberry shortcake.  I remembered telling him once in passing that it was my favorite dessert as I was carrying a take out box full of it on the way to my apartment.   I thanked him and took the bowl, then walked inside and dead-bolted the door locked.  Then I proceeded to eat the dang thing while I waited for my husband to get there!  He was SO mad at me for eating it!!!!  What if it was poisoned?!?!

  Y'all...that strawberry shortcake looked so good that the thought of contamination didn't even cross my mind.  I was SO unbelievably naive!!!  I was also 14 years younger.  I'd like to think I'm a lot less trusting and way more guarded and aware these days :)

All that to be said, everytime I make strawberry shortcake, it makes me think of that weird incident.  Needless to say, when I made this version a few weeks ago my husband and I had to reminisce.  
That bowl of shortcake I shouldn't have eaten all those years ago doesn't even begin to hold a candle to this delightful version.  

This dessert is light and fluffy and won't leave you feeling stuffed.  A perfect treat to indulge in after you're all done with dinner...or when you just want a little taste of sweet :)  This is, by far, one of my most favorite versions of my favorite dessert.

STRAWBERRY SHORTCAKE TRIFLE
1 pre-baked angel food cake , cubed
1 pint of fresh strawberries, sliced
1 pkg. (3.4 oz.) french vanilla instant pudding (prepared)
2 (8 oz.) tubs of whipped topping


I absolutely love Kroger's pre-baked angel food cakes from the bakery section.  You can either buy one or make one yourself, but I'm all about #easy, so you can guess what I did.  

Cut or tear apart the angel food cake into small chunks/cubes and set aside.

Wash and slice your strawberries and set aside.

Prepare the pudding according to package directions and set aside in the fridge to set for about 5-10 minutes.  

Remove pudding from fridge and mix with 1 (80z.) tub of whipped topping and set aside.  I used Cool Whip.

Now let's layer.

Place half of the angel food cake cubes/chunks in the bottom of a trifle dish.  Top with half of the sliced strawberries and top that with half of the pudding/whipped topping mixture.  

Repeat the layering process.  Cake...strawberries...pudding/whipped topping.  

Top it all off with a generous helping of whipped topping.

TO DIE FOR!!!!


Seriously.  One of my favorite ways to have strawberry shortcake!  

A few things....

You could sub the angel food cake for pound cake or white cake, but both would change the flavor profile.  That to be said, I'm sure it would be great with both and plan on trying it soon!!!

Instead of the french vanilla pudding, consider adding lemon instead.   I LOVE the lemon/strawberry combo SO MUCH!!!!  

Any other ideas?!  

The best thing about a trifle is that they're SO easy to make...and they look pretty, too!  You can do pretty much anything with a trifle and the slightest of changes will give you a whole new dessert!!!  

SO GOOD!

Thursday, April 21, 2016

Oh, Oh, Oreo

I have an Oreo addiction.  Thin...double stuf...regular...flavored.  I don't discriminate.  I love them ALL.  However, my favorite is just a regular ol' Oreo.  Preferably with a huge glass of cold milk.  I'm a dunker.  I wish I could indulge in these little bites of heaven on a daily basis, but sadly I can't satiate my cravings like I want.  It's so much fun getting older! ( did you read that with sarcasm?!)

Considering my love of America's favorite twistable cookie, it only stands to reason that I HAD to make this happen when I saw this video on Facebook.  HELLO!  All of my favorite not-healthy-for-me-at-all things in one pie dish....SOLD.  

Since I really couldn't justify making this to indulge in after a regular weeknight dinner, I waited until we were hosting company here at the house so that I wouldn't be the only one to consume all the calories & sugar.  I can't begin to tell you what a hit this pie was!  Everyone here was raving about it!!  I honestly should've made two because our guests were wanting second servings (and so was I), but I settled for an empty pie plate full of crumbs (that I later scooped up and ate) #ItDoesntCountIfNoOneSeesYou.

If you need a dessert to take to potlucks, or one to make for a crowd, let this one be it. Just be sure to make an extra, y'know, in case you want to throw all caution to the wind :)  

NO BAKE OREO PIE

1 pkg. of Oreo Cookies (about 39-40 total)
1/2 stick (4 TBSP) butter, melted
1 (8 oz.) pkg. cream cheese, softened
1 (8 oz.) tub Cool Whip
1/2 C. milk chocolate chips, melted
1/2 C. confectioner's powdered sugar

Do you feel like you could go into sugar shock right about now???  Me too.  But it's worth it...


First thing's first.  


Place 25 Oreos in your food processor and crush until fine.  


Add the melted butter to the crushed Oreos and mix until combined.  This will form your pie crust.  Transfer to an 8 or 9 inch pie dish and press mixture evenly into the dish using your fingertips.


In a separate bowl,  mix cream cheese, cool whip, and powdered sugar until smooth.  Transfer half of the mixture to a separate bowl and set aside.

Now crush 8 more Oreos with  your food processor until fine and mix them in with one half of the cream cheese mixture.


Melt 1/2 cup of chocolate chip morsels and mix with the other half of the cream cheese mixture until well combined. 


Spread the crushed Oreo/cream cheese mixture evenly atop the crust.


Take the remaining Oreos and place evenly atop the cream cheese mixture.


Evenly top the Oreos with the melted chocolate/cream cheese mixture.
Are you dying yet?!


Sprinkle crushed Oreos on top of the melted chocolate/cream cheese layer and place in refrigerator to set.  If at all possible, keep refrigerated overnight.  Otherwise be sure to keep it refrigerated at least two hours before serving, but in this case the longer you can keep it refrigerated before serving, the better.  


There's absolutely NOTHING healthy about this dessert which is probably why I couldn't devoured the entire thing in one sitting.  IT IS UNBELIEVABLE!!!!!!!  

Satisfied my Oreo craving like you wouldn't believe.  

I'm a big believer in "everything in moderation", but y'all...moderation was a struggle for me with this dessert. #thestruggleisreal

This was extremely easy and quick to prep which made it all the better.  I've already had a few of our guests request I make it for our next Sunday Funday. I will, of course, happily oblige.  Only next time I'll be sure to make an extra!!!!  

YUM!!!!!

Tuesday, April 12, 2016

My Favorite Coconut Cake

Coconut is by far one of my most favorite flavors.  I don't remember always feeling that way, but in the last ten years my palate definitely craves the flavor quite often.  When I used to live in the Dallas area, my mom would come to visit and she would always make time for a stop at the Cotton Patch Cafe for their coconut cream pie.  Sinfully delicious!   I think that's how my love affair with coconut got started.

I remember filling out a "favorite things" sheet for my old school and indicated that coconut cake was my favorite dessert. For teacher appreciation week about six years ago, one of my sweeties brought me the most delicious, homemade coconut cake to round out my week.  It was the most decadent treat and I'm pretty sure I almost devoured the entire thing...ALONE.  Not ashamed to admit that.  I've since made it a million times and always think about my sweet little blondie, Andrew T., whose mom made it for me first all those years ago.  Truly the gift that keeps on giving :)


If there's one dessert that you need to keep on rotation in the warm months ahead, this one should be it!  I made this for Easter and there wasn't a bite left when it was all said and done.  My mom and I clearly aren't the only ones with a preference for this flavor.  So AMAZINGLY delicious!!!!!

SOUR CREAM COCONUT CAKE with CREAM CHEESE FROSTING

CAKE
1 pkg. white cake mix
1 (15 oz.) can of cream of coconut
1 C. sour cream
1/2 C. vegetable oil
3 eggs

CREAM CHEESE FROSTING
8 oz.cream cheese, softened
1 (16 oz.) pkg confectioner's sugar
1/2 C. (1 stick) butter, softened
1 tsp. vanilla

1 (7oz.) pkg, sweetened coconut flakes


Preheat oven to 350 degrees.

In a large bowl, combine the cake mix, cream of coconut, sour cream, vegetable oil, and eggs.  Mix until combined and well blended.  

Just in case you're wondering about the cream of coconut, I get mine in the liquor aisle next to the mixers.  

Once combined, spoon mixture into a greased & floured 9x13 inch cake pan.  As you can see, I used two 8" round pans and that wasn't a good idea.  Since I'd never made it like this in the past, I wanted to try for Easter...I was wanting a "pretty" cake to display on the dessert table.  Y'all.  Bad idea.  This is a crumbly cake and doesn't set quite like a regular cake.  It looked like a hot disaster when it wasn't iced and transferring it from the pan to the baking rack to the cake dish was just awful.  Stick to the 9x13!!!  It always turns out amazing!!! 

Bake on 350 for 45-55 minutes.

While the cake is baking, whip up the cream cheese frosting.

Just combine the cream cheese, powdered sugar, butter, and vanilla in a large mixing bowl and beat until well blended.  

Once the cake cools, spread the cream cheese frosting generously over the top.  Sprinkle the sweetened flaked coconut over the top of the frosting, cut you a slice, and then cut you about five more...you won't be able to stop once you start!!!!!  


Like I said earlier, this truly is the gift that keeps on giving!  

I couldn't possibly articulate how delicious this really is...trust me when I say you need to try this as soon as you can!  This is great to take to potluck dinners...it's ALWAYS a hit!  

Just remember to bake it in a 9x13 if you want to keep your sanity :)

Monday, February 1, 2016

Something Sweet to Start Your Week

Weekends fly by at warp speed these days, but then again, what doesn't?!  Now we're headed into a new week and starting off the month with a delicious dessert you don't want to pass up!

On Fridays we usually wear blue for school spirit, but last Friday we were decked out in our orange to support a friend whose son underwent limb salvage surgery.  We've been talking about MacKale and praying for him every night since he was diagnosed with cancer.  My boys are always asking about him and have so many questions about everything.  Their prayers were so heartfelt the night before his surgery.  As soon as I picked them up from school on Friday, they both asked, "Is MacKale out of surgery yet?  Is he okay?"  My oldest is very empathetic and sensitive and when I told him MacKale was finally out of surgery and everything went well, his eyes welled up with tears and he whispered and excited "YES!" as he fist pumped the air.  Although the boys have never met MacKale, they pray for him like he's family.  We'd love for you to keep this sweet family in your prayers....you can keep up with MacKale's journey here:  MacKale's Journey


This sweet one participated in his first UIL competition.  He was SO excited to be on the creative writing team.  He woke up bright and early on Saturday morning and couldn't wait to get on the bus and spend the day with his friends.  He was beaming with pride when he placed!  Bless!! SO proud of him!


The rest of our weekend was pretty low-key.  I flew to OKC yesterday for a two-day Kindergarten conference and I'm so excited to spend today and tomorrow talking shop!  

I'm heading to Dallas this weekend to spend time with some of my best friends, so no meal planning just yet.  I'll be winging it...pretty much like everything else in life right now, hahaha.
Dallas here I come!!!

Let's start the month of love with something I adore...DESSERT!!!!  Here's a little something sweet that's easy to make, but tastes like you slaved over it for hours.  If you're a fan of chocolate and toffee, here's your fix!!!

CHOCOLATE TOFFEE BARS
1 & 1/2 sticks of salted butter, softened
3/4 C. light brown sugar
1 & 1/2 C. all-purpose flour
1 (14 oz.) can sweetened condensed milk
2 TBSP. butter
1 (16 oz.) bag milk chocolate chips
1-2 C. toffee bits


Preheat your oven to 350 and lightly grease a 9x13 pan.

In a large bowl, mix together the softened butter, brown sugar, and flour.  This will make your crust, so expect your dough to be a bit crumbly in appearance.  Transfer the dough to the greased 9x13 pan and press evenly to the bottom of the pan.


Cook for 20-25 minutes or until the crust is golden and then remove from oven.  Make sure to keep the oven on because you'll need it again!

In a small saucepan, heat the sweetened condensed milk and the 2 tablespoons of butter on med/low heat for about 5-10 minutes...just long enough to thicken up the mixture.  Pour that on top of the cooled crust and spread evenly over the top.   Return to the oven for an additional 12-15 minutes (or until it is lightly golden).

Remove from oven and evenly spread chocolate chips on top.  Then go ahead and return back to the oven for about 2-3 minutes.  This will soften up the chocolate chips and make them spreadable.


Remove from oven, spread the chocolate chips, and top with toffee bits...as much or little as you prefer.  Of course, we preferred a ton!  


Cool to room temperature and cut into bars.  

I made a batch of these on Friday, cut them into bars, saved a few for our family, and gifted the rest to our new neighbors :)


These are absolutely decadent!!!  Depending on how big/small you cut them, you can get about 12-18 bars out of one batch.  Great for parties, potlucks, or even welcoming people to the neighborhood.  You're sure to be the favorite neighbor with this kind of treat ;)