Showing posts with label veggies. Show all posts

Monday, August 27, 2018

You Butternut Pout

My husband and I were recently talking about how our eating habits have changed since we got married 14 years ago.  I was an AWFUL cook.  Like, couldn't toast toast kind of bad.  For the first 3 years of our marriage, we survived on tater tot casseroles, chicken squares (gag), Hamburger Helper, and pizza.  We eventually moved onto a variety of meals to make up for those lost three years, but only in the recent years have we shifted toward a healthier diet.  I'm not saying we're perfect eaters 100% of the time.  We still love all the "bad" stuff, too.  But these days we practice the motto, "everything in moderation".  On nights when we want something that could easily double as a "bad" meal, we opt for this dish.  Savory with a touch of sweetness all wrapped into one.  So you butternut pout (see what I did there?!) because this is just as tasty and sinful as anything I ever cooked those first three years of marriage!<---see anything="" as="" because="" did="" div="" ever="" i="" is="" just="" little="" number="" sinful="" tasty="" there="" this="" tried="" ve="" we="" what="">


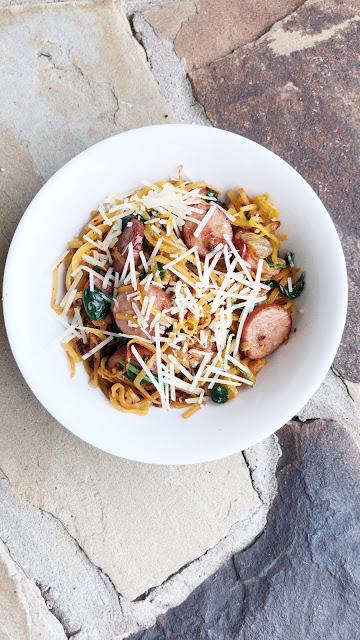
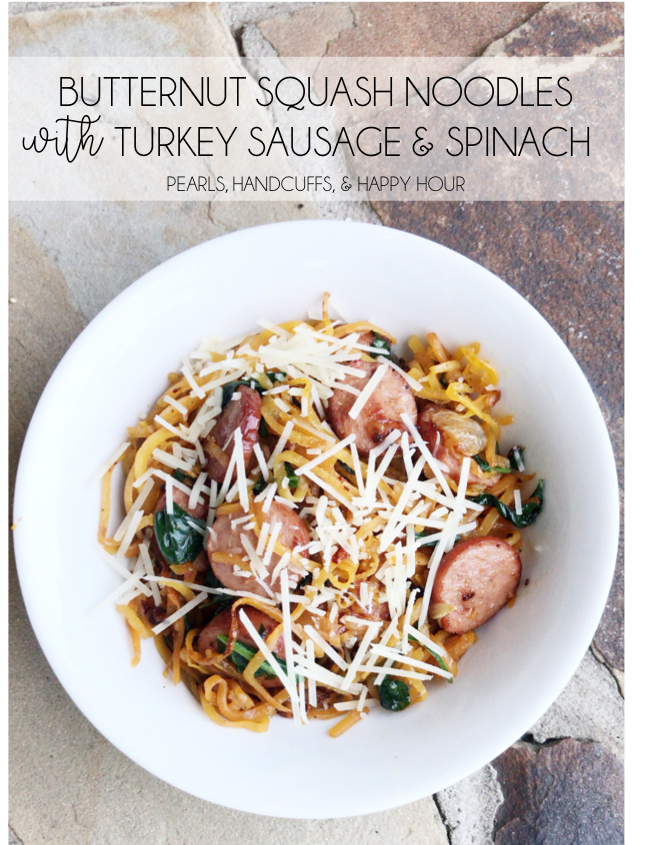
BUTTERNUT SQUASH NOODLES WITH SAUSAGE & SPINACH

1 pkg. butternut squash noodles
2 tsp. minced garlic
1 tsp. + 1/2 TBSP. olive oil
1/2 yellow onion, sliced
1 link turkey sausage, sliced
1 C. baby spinach
sea salt & cracked pepper, to taste

Optional
crushed red pepper flakes, to taste
shredded parmesan cheese, to tase

Preheat oven to 400.  Line a baking sheet with foil.  

Toss salt, pepper, olive oil, and squash in a gallon sized ziplock baggie.  Seal and shake until the noodles are coated.  Evenly spread noodles out onto the baking sheet and cook for 10-12 minutes or until al dente.

You can spiralize your own butternut squash OR take the easy way out like I did and buy a pre-spiralized package.  You can typically find these in the produce department close to the bagged salads and whatnot.  


While the squash is cooking, saute the onion, garlic, & sausage in a skillet with 1/2 tbsp. of olive oil over medium heat.  Cook until sausage is browned and onions are translucent.


Remove squash from the oven and transfer to the skillet with the sausage and onion.  Add a cup of baby spinach to the mix and cook over low heat until spinach is wilted.  I added some crushed red pepper because I like things a little hot.  If you're into that sort of thing, I strongly recommend that optional addition.


If you're so inclined top your serving with a sprinkle of shredded parmesan.


This is one of my go-to dishes.  Quick enough to whip up for a weekday lunch or filling enough as a dinner for two.  Extremely flavorful and low in carbs, too (if you're keeping track).  This is one of those recipes that never gets old!


Thursday, September 10, 2015

Did Somebody Say Zoodle?!

So I got my first Hello Fresh box yesterday....


I was giddy.  Dinner in a box.  All I have to do is cook it.  Yesterday's shipment included Italian Meatloaf, Chinese Black Bean Chicken, and Pan-Seared Salmon. 3 meals for the week, the other two are all me.  We settled on Chinese Black Bean Chicken last night and it was NOT a flavor profile I ever want in my mouth again.  I don't cook with much ginger although I'm not opposed to the taste.  However, that flavor overwhelmed the dish and I ended up with a yuck taste in my mouth and couldn't finish my meal.  All that to be said, I have several friends who LOVE this service, so I won't base my opinion on one little dish.  I didn't choose the meals because it was a free box, but I can choose all that follow and pause shipment at any time so I'm perfectly great with that!  Looking forward to the next two meals!!!
Next up I'll be trying out Home Chef, then Blue Apron, and finally Plated.  Next month I'll do a little comparison with pros and cons of each. 

I don't plan on using a food delivery service every week because I still love my tried and true meals and trying out recipes from some of my favorite cookbooks, but I LOVE that it takes the guesswork out of meal planning.  I love that I don't have to think about what I'm cooking and it encourages me to try new things I wouldn't normally attempt to cook.  I'm anxious to see how these other food delivery services pan out :) 

When I'm not having food delivered to my doorstep, I'm leaning on the tried and true flavors I know and love.  We're big fans of seafood here in this house...and by we I mean me and my husband...so when I found this recipe I knew it had to go on the menu.  Shrimp is definitely my favorite seafood flavor and when it's paired with the right amount of spice, a little lemon, and one of my favorite veggies??!?!  Forget about it.  Too good to pass up!

SPICY SHRIMP AND ZOODLES

2 TBSP. olive oil
1 lb. jumbo shrimp, peeled and deveined
1 TBSP. minced garlic
1/4 tsp. red pepper flakes
1/4 C. chicken broth
Juice from 1 large lemon
2-3 medium zucchinis, julienned
salt & pepper, to taste


***Prior to cooking this dish, you will need to cut your zucchini into noodles.  I used my mandoline for this simple task, but you could also use a spiralizer.  Just make sure you have one of these in your arsenal of kitchen gadgets to make this go faster :)***

Heat oil in a large skillet and add garlic and crushed red pepper flakes.  Cook for a minute(ish) and be sure to stir constantly to avoid burnt and sticky garlic/red pepper.

Toss the peeled/deveined shrimp into the skillet and stir to coat with the oil/garlic/red pepper flakes already in the skilled.  Cook until shrimp are pink and heated through, about 3-5 minutes. Season the shrimp with salt and pepper, to taste, and give it a good stir before removing from the skillet.  Use a slotted spoon to transfer shrimp to a bowl and set aside.  

Add the chicken broth and lemon juice to the same skillet.  As the liquid heats, scrape the pan with a wooden spoon.  After two minutes, add the zucchini noodles...aka: ZOODLES...to the skillet and stir for about 3-5 minutes.

Toss shrimp back into the skillet of zoodles, stir, and season with a little more salt and pepper.  And maybe another sprinkling of red pepper flakes if you like it hot (we did ).  Serve warm and enjoy!


I can't say enough good things about this dish!!!  If you like shrimp like we do, you MUST try this SOON!  It was just the right amount of kick.  The shrimp were seasoned to perfection and the sauce with the zoodles was outstanding.  I used two zucchini in mine, but next time I'll up it to three.  Of course, this would've been amazing served with angel hair pasta as opposed to the zucchini, but this was pretty outstanding as is.  It filled me without leaving me stuffed and I love that kind of meal.  The flavor of the zoodles paired with the sauce couldn't have been better.  This is a pretty guilt free meal that I can foresee serving a lot more in the months to come!!!  
Winner, winner spicy shrimp dinner!!!!

Tuesday, September 2, 2014

Pasta Perfection

If you've been reading this blog for any length of time, you probably know that I'm a sucker for pasta.  I have over 30 pasta recipes on this little blog {not mine of course.  I'm not a chef...I just know how to follow recipes :)}    Pasta is, by far, my most favorite thing to eat.  I could absolutely eat it every single day.  I really do try to refrain.  My jeans pretty much beg me to take it easy on the carbs :) This dish would've been perfect without the addition of said carb, but I'm pretty sure it adds to the overall delightfulness of this meal, so don't leave it out.

Pasta can be really heavy depending on how you prepare it.  This, however, is anything but filling.  It's light and robust all at the same time.  No heavy sauces.  No crazy ingredients.  If you ask me, it's perfection in a bowl.  

SPICY SAUSAGE AND PEPPER PASTA

12 oz. Penne Pasta {I used Penne Plus, Market Pantry}

2 TBSP. Olive Oil

2 cloves garlic, minced {I used 1 Tbsp. pre minced garlic}

1/2 red onion, sliced

1/2 red bell pepper, sliced

1/2 yellow bell pepper, sliced

1/2 orange bell pepper, sliced

 1 pkg. Smoked Turkey Sausage, cut into 1/2 inch slices

Crushed red pepper, to taste

Grape tomatoes, halved {to taste}

1/3 cup chopped fresh basil {more or less depending on your preference}

Shredded parmesan cheese, to taste

Salt & pepper, to taste


This little dish takes no time to prep and cook.  You'll spend most of your time...a whopping 5 minutes...slicing the veggies, herbs, and sausage.  

Go ahead and start cooking your pasta according to package directions.  Heat the olive oil over medium-high heat in a large skillet and the sausage, onion, veggies, and garlic.  Toss in some crushed red pepper while you're at it.  I added quite a bit because we love a little kick in our food.  Add as much...or as little...as you want.  Saute for about 5 minutes or until the veggies & onion soften up.   


Remove the sausage, onion, & peppers from the heat and set aside.  Drain pasta and return it to the pot.  Now toss in the onion/pepper/sausage mix.  And don't forget to add the tomatoes and basil, too.  Mr. Spouse isn't a huge fan of tomatoes so I didn't add too many of those. Toss ingredients until well mixed.  


Now serve yourself a generous helping and top it off with shredded parmesan cheese.  It's okay to be liberal with your serving of cheese...trust me ;)


From start to finish, this dish took me about 25-30 minutes to get on the table.  I know I live my life in exclamation points and I'm a bit dramatic about everything, but seriously...this is AMAZING!!!!!  And if amazing doesn't quite explain it, let me give you a few synonyms that will....
Awesome.  Incredible.  Wonderful.  Marvelous.  Delectable.  Savory.  Scrumptious.  Palatable.
{Insert your adjective here.}

If you're looking for a quick weeknight meal that's easy to prep and takes no time to get on the table and in your mouth, look no further.  Absolute PERFECTION.


When I make a recipe for the very first time, I follow it to a T.  I don't like to veer away from it because, like I said before, I'm not a cook.  After I have it for the first time, I'll figure out what needs to be added/omitted and then eventually make it again with those changes.  When I make this again...which will be VERY soon...I'll use the WHOLE pepper and more red onion because I love a pasta brimming with loads of veggies.  A definite keeper!!!!


Friday, May 6, 2011

Champagne Salad

I have the dang cutest friends in the world...I'm pretty sure of it.  One in particular I happen to be blessed to work with and have for several years.  Her name is Jill and she's responsible for this AMAZING recipe I keep stocked in the fridge all summer long.  Well, here's another one from her arsenal of delicious salads.  When I was pregnant and shoving fistfuls of Taco Cabana tortillas down my throat...followed by an insane volume of queso...Jill would bring the yummiest salads to eat for lunch.  Talk about feeling myself getting fatter as I watched her eat healthy :)  HA!!  In addition to mass amounts of Mexican fare, I also CRAVED salads and veggies.  Thank goodness because I'm sure that helped curb my staggering weight gain.  Anyhoo...I made Jill fork over the recipe so that I could make this anytime I needed to satisfy my craving...and I still eat it to this day!!!! 


CHAMPAGNE SALAD

2 avocados, cubed

2 tomatoes, cubed

Fresh mozzarella, cubed

Fresh basil, sliced into thin strips

Gerard's Champagne dressing

salt & pepper, to taste


The Players…

champagnesalad

The Game Plan…

Combine avocado, tomato, mozzarella, & basil in a large bowl.  Top with dressing and toss to coat. 

champagnesalad3

I used to only be able to get this dressing at Kroger, but now I can get it at Target, too!!  Champagne dressing and cute skirts all in one shopping trip ;)  HA!

champagnesalad4

This salad is best served fresh, although I've made it at night & eaten it for lunch the next day.

champagnesalad5

  I  think it tastes best right after it's fixed...the avocados/tomatoes/mozzarella get a little soggy from the dressing and I like it when it's a little firmer.  Just a texture preference.  And the avocado get a little icky looking after a while.  I would definitely say that this can keep for about 24 hours, but after that you'll wanna make a fresh batch.  This is, hands down, one of my most FAVORITE salads!!  Perfect on it's own or as an accessory to a bigger meal :)  I'm off to make some more now!!!  YUM!!! 

champagnesalad6

Tuesday, October 5, 2010

One Dish, Two Recipes

Recently, my cute little mom went on a girls trip where she relived the glory days and made new memories. Y’all, she’s darling and she and her friends know how to have FUN! Anywho, while they were away, the girls took turns cooking a few different things for the group. She came home RAVING about this yummo side dish one of her friends made and she INSISTED on making it for my Grandma’s “celebration of life”. And y’all…I’m so glad she did!! It was GOOD!!! Crazy enough, I had just bookmarked a Deen Brothers recipe almost identical to the one she was telling me about! Now that I’ve had mom’s version, I’m dying to try the Deen Brothers because they are their stuff is pretty dang YUMMY, too ;) SO...here are two recipes for a little Creamed Corn Casserole that you’re SURE to LOVE!!!! {And if you try the Deen Brother’s version, let me know how it is!!!!}

CREAMED CORN WITH A KICK {Mom’s Recipe}

1 {10 oz.} bag of frozen corn, thawed

1 {8 oz.} pkg. cream cheese

1 can diced green chiles

Cook frozen corn according to package. Drain. While hot, mix the cream cheese with the corn and add the green chiles. Mix well. Bake at 350 for 15-20 minutes.

creamedcorn1

SO.DANG.YUMMY!!!!

Now here’s the Deen Brother’s version of a Creamed Corn Casserole…

CREAMED CORN & FRIED ONION CASSEROLE

1 {10 oz.} pkg frozen corn, thawed

1 {8 oz.} pkg. cream cheese

1 cup canned French Fried Onions {like French’s}

salt & pepper to taste

In an 8x8 greased baking dish, spread the cream cheese evenly on the bottom. Top with thawed corn, pressing the corn into the cream cheese. Season to taste with salt & pepper and spread the fried onions evenly over the top. Bake at 350 for 30 minutes.

Ummmm…Momma Deen didn’t raise no fools. That sounds REdiculous and I seriously can’t wait to try it!!!!

Wednesday, August 11, 2010

Got Veggies?! And Chicken?!

I love finding random recipes…especially when they turn out delicious! This little number was surprisingly tasty. I was on the lookout for something a little lighter for dinner and when I found this recipe, I thought it would be perfect…and I was NOT disappointed! I love anything that can be served in a pita, but I’m thinkin’ this little concoction would be pretty good all alone or on top of a bed of baby spinach, too! If you decide to try this, let me know how you served it!!!

VEGGIE CHICKEN PITAS

1 medium red onion, sliced

1 cup fresh broccoli, chopped

1 cup julienned carrots {I bought a bag of pre-julienned carrots…one less step :)}

1/2 tsp. minced garlic {I used 1 tsp. chopped garlic in a jar}

2 tbsp. olive oil

1 cup cooked chicken, cubed {I think shredded rotisserie would work perfect!}

1 jar roasted red pepper, drained & chopped

1/2 tsp. dried oregano

1/2 tsp. cayenne pepper

1/4 cup chicken broth

1/3 cup shredded cheddar

1/3 cup shredded mozzarella

The brunt of the legwork for this meal will be chopping/slicing the veggies. I HIGHLY recommend buying the carrot strips in a bag. The convenience was totally worth the extra $.

VeggieChickenPita1

Saute onions, carrots, broccoli, & garlic in olive oil for about 4-5 minutes or until tender.

VeggieChickenPita3

Stir in {cooked} chicken, red peppers, chicken broth, oregano, and cayenne. Bring to a boil then reduce heat & simmer {uncovered} for about 5-6 minutes or until heated through.

VeggieChickenPita4

C’mon. Now tell me that doesn’t look absolutely DELICIOUS?!?!?! Once heated through, mix in mozzarella and cheddar. Mix thoroughly until veggie/chicken mix is evenly coated in gooey cheesiness :) Spoon the mixture into the pita and ENJOY!! I promise you will :)

VeggieChickenPita5

Seriously, y’all. Does that not look YUM?! IT IS!! You could also add a cup of fresh snow peas to the mix if you’re so inclined. We skipped that step because I’m not the biggest fan of peas. Boo. This little pita dish was FULL of flavor! And like I said before, the brunt of the legwork comes with chopping/slicing all the veggies. Of course, a little cook time is involved if you decided to boil & cube your own chicken, but I think that shredded rotisserie chicken would be just as good and require a lot less time!

Saturday, August 7, 2010

Pregnancy Craving

Okay…I’m so NOT pregnant, but when I was with my littlest itty, I craved veggies. Namely, broccoli. I couldn’t get enough. Although I like broccoli, I can definitely say I never liked it as much as I did when I was pregnant. My sweet friend, Jill, introduced me to this broccoli salad and I was in heaven. She would make it for our team for different occasions and I was always the girl going back for numerous helpings. It’s SO dang good! I crave this salad even now and I’m the farthest thing away from being pregnant :) It’s so refreshing and tasty!

RAW BROCCOLI SALAD

1 bag of broccoli florets, chopped

2 tbsp. Splenda

2 tbsp. apple cider vinegar

2 tbsp. mayo

2 tbsp. sunflower seeds

3 tbsp. seedless raisins

1 cup green onions, chopped

Chop broccoli and remove stems. You don’t have to worry about chopping it into tiny pieces. Chunks are better :)

broccolisalad2

Mix together Splenda, mayo, sunflower seeds, raisins, and green onions. This will be your dressing.

broccolisalad3

In a large bowl {covered}, toss dressing and broccoli together until evenly coated.

broccolisalad4

Chill until ready to serve. Or, if you’re like me, dig right in and go to town!!!! HA!

I usually like to make a double batch of this salad to munch on throughout the week. It’s great by itself or as a little side with a sandwich. If you aren’t a fan of green onions, you can replace them with 1/4 cup of red onions. I always feel like the red onions are a little overwhelming, so I prefer the green. AND, I ALWAYS add a lot more than 3 tablespoons of raisins because I LOVE the way they taste with this salad!!! This will keep in the fridge for about a week. Now get in the kitchen and whip this up for yourself! You’ll be so happy you did!

Thursday, June 10, 2010

A Summer Favorite

When I first went home to meet Mr. Spouse's family, his mom made this cucumber and onion salad.  At first glance, it looked pretty dang good...especially if you're a fan of cucumbers and onions like me.  But when I heard that the "sauce" was made of water, vinegar, and sugar, I was freakin' out.  That didn't sound good at all!!  Thankfully, I couldn't say no.  I mean, how can you tell your hopefully soon to be mother-in-law her food doesn't sound good?!  So, I reluctantly tried it and FELL.IN.LOVE!!!!!  I definitely went back for seconds...and then for thirds :)  And then I really pushed it and asked for the recipe!  SO happy she shared it because this is DEFINITELY one of our summer FAVORITES!!!!!! 

CUCUMBER AND ONION SALAD

1-2 cucumbers, thinly sliced

1 onion, sliced thin

1/3 cup white vinegar

1/2 cup sugar

1 cup water

First peel the cucumber{s}.  I like to leave a little green on them because it makes the salad look pretty :)

cucumber&onionsalad

Now slice ‘em thin.  And I mean THIN. 

cucumber&onionsalad2

And do the same with the onion.  Slice it REALLY thin, too :)

cucumber&onionsalad3

Now, combine the cucumber and onion in a pretty little bowl and cover with water.  Top it off with a few ice cubes and refrigerate for about 15-20 minutes.  Mom-in-law says that’s helps to make the veggies “crisp” :)

cucumber&onionsalad4

Remove the salad from the fridge and completely drain.  My mother-in-law leaves a little water in it instead of draining the whole thing because she’s amazing when it comes to being able to “eyeball” a recipe. I, however, am not. 

cucumber&onionsalad5

Now, it’s time to add the “dressing”. Add the vinegar, sugar, and water to the cucumber & onion and mix thoroughly.

cucumber&onionsalad6 

I guess that’s all the pictures I took?!  Anyway, this is definitely our favorite summer salad!!!  We LOVE to serve this any time we grill out…it’s the best side dish to serve with burgers & hot dogs!!!  Really though, it’s great with ANYTHING!  Super refreshing and amazingly YUM!!!  We’re stocked up on cucumbers and onions…are you?!?!

Saturday, April 24, 2010

Just Like Grandma Used To Make

Okay…so I don’t remember my Grandma{s} making anything like this growing up, but it definitely reminds me of something a grandma would whip up.  It’s SUCH a comfort food it’s ridiculous.  I won’t begin to tell you how many servings I helped myself to, nor will I share the quickness in which it was devoured.  This is the PERFECT makes-me-feel-so-cozy meal and we’ll DEFINITELY be eating this again…SOON!!

CREAMY CHICKEN & BROCCOLI CASSEROLE

3 chicken breasts, cooked & shredded

2 cans of cream of chicken soup

1 cup of mayo

1 cup shredded cheddar cheese

1 cup colby & monterrey jack cheese

1 bag frozen broccoli,thawed and chopped

salt & pepper to taste

Cook chicken & shred.  Meanwhile, chop the broccoli.  Okay…so we used frozen broccoli, and while I know they make the frozen chopped broccoli, the store was OUT.  SO, I chopped my own…and it didn’t take any time.

broccolichickencasserole1

Now, mix all ingredients together.

broccolichickencasserole2broccolichickencasserole3 

Transfer mixture to a lightly greased 2 qt. casserole dish & heat oven to 375. 

broccolichickencasserole4

Cook for 30 minutes or until bubbly.

broccolichickencasserole5

And the most important part…SERVE WITH RICE!!!!  Omg…SO AMAZING!!!!!!!  This is definitely a meal where the leftovers are *almost* better!! These pictures are making my mouth water…time to eat!!!

broccolichickencasserole6

Friday, December 11, 2009

My Thanksgiving Contribution

This year, my mom & I contributed the YUMMIEST dish to our Thanksgiving spread…RITZ Broccoli Casserole!  I LOVE broccoli, but I’m NOT a fan of broccoli & cheese and that’s what my mom originally wanted to take.  So, after a little recipe searching on the Kraft Foods website {my FAVORITE!!!!}, I found a casserole I knew would be a HIT!  Let’s face it….ANYTHING with RITZ is bound to be good!!!!

RITZ BROCCOLI CASSEROLE

3 pkg. (10 oz. each) frozen chopped broccoli, thawed, drained

3/4 lb.  (12 oz.) VELVEETA, cut into 1/2-inch cubes

36 RITZ Crackers, coarsely crushed (about 1-1/2 cups), divided

1/4 cup  (1/2 stick) butter or margarine, melted

***TeamCarroll4 version:  we used the refrigerated broccoli florets & chopped ‘em up.  We also added more crackers based on some of the reviews we read on the website….we added 1 sleeve {crushed} to the broccoli & about 1-1/2 sleeve{s} for the topping.***

First we chopped the broccoli. 

broccoli2

Then we mixed it together with a sleeve of crushed RITZ…

broccoli4

And then mixed in the cheese.

broccoli5

We took the cracker/butter combo…

broccoli3

… and spread evenly over the top.   

broccoli6 

Bake at 350 for 45 minutes or until heated through. 

broccoli7

This is one broccoli cheese casserole that gets my “thumbs-up” seal of approval!!

broccoli8